
Published 2019-07-24.
Last modified 2019-08-12.
Time to read: 15 minutes.
This lecture discusses how to work with sbt and IntelliJ IDEA by JetBrains.
This lecture is for programmers who would like to use IntelliJ IDEA with this course and those that follow. It has been updated to IDEA 2019.1.1, and discusses special considerations for macOS, Linux and Windows. The demo at the end of the lecture shows various ways of searching, navigating Scala and Java code, viewing project directories and the inheritance hierarchy, working with favorites, multi-pane and multi-window editing and examining dependencies.
IDEA 2019.2 Scala Plugin Major Update
Opening Sbt Projects
One of the unique features of IDEA is that it can directly open sbt projects.
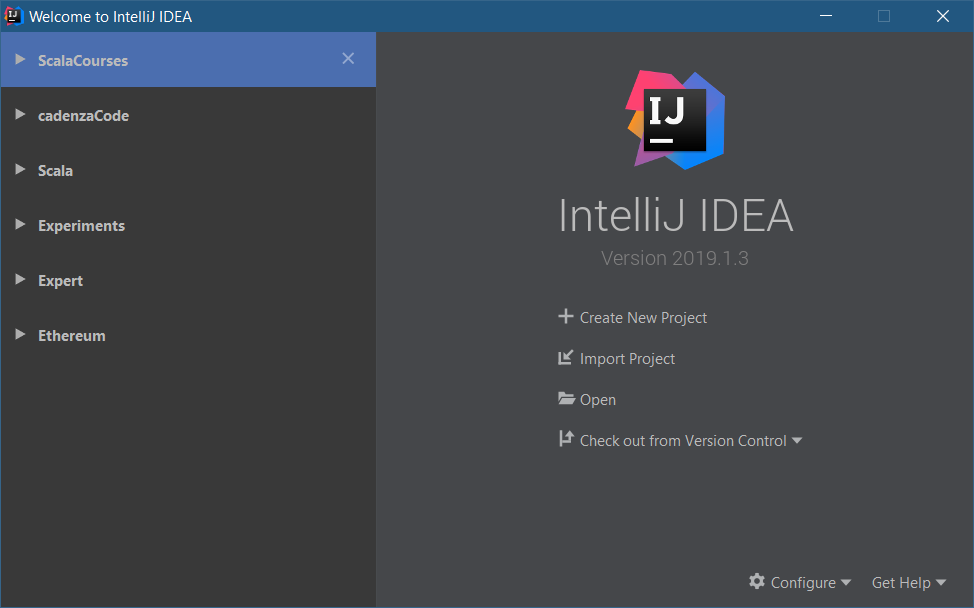
To do this, click on the Open menu item from the IDEA welcome screen:
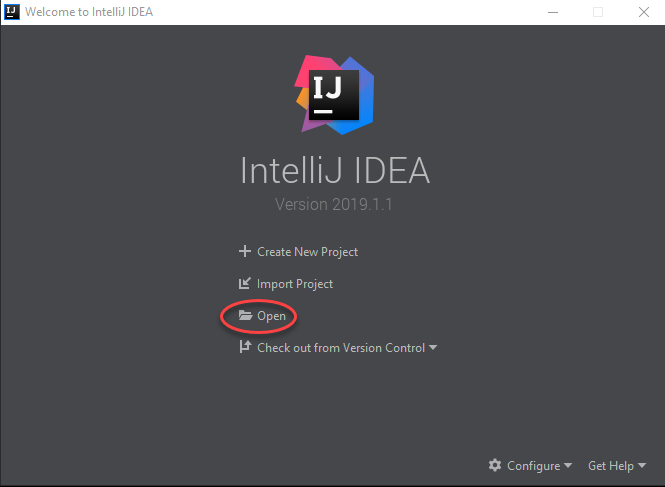
The Open menu option will import an sbt project if you select an sbt project directory;
you don’t need to click on a file.
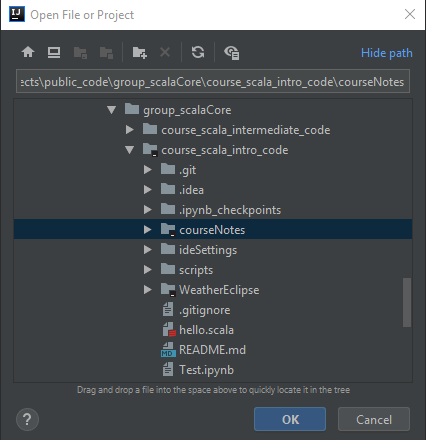
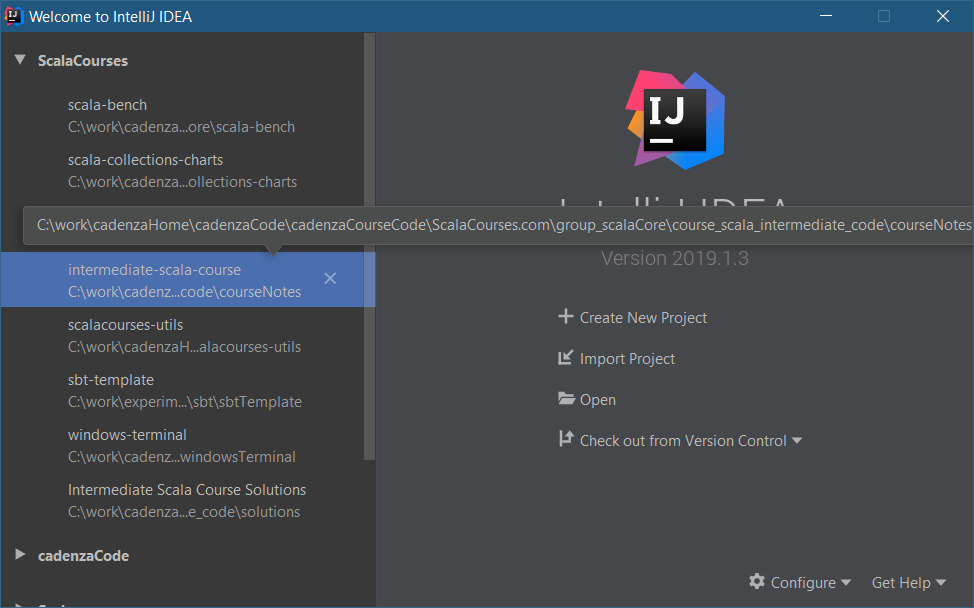
Here you see me selecting the directory that I installed the course notes into.
Refer to the start of the transcript for the
Scala Overview and Philosophy
lecture in case you have not cloned the git repository containing the course notes code.
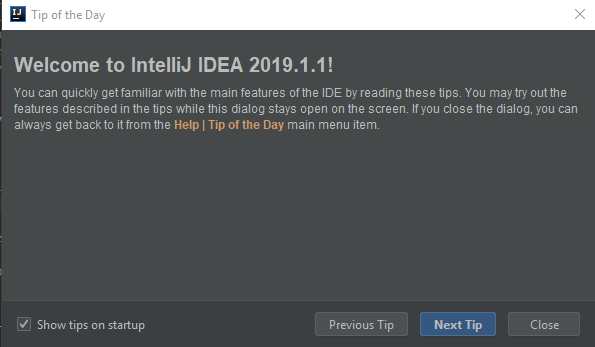
You’ll be presented with the tip of the day of you enabled that feature while installing IDEA in the previous lecture.
Configuring Git for IDEA
We discussed how to configure git for IDEA for all operating systems in the previous lecture,
Setting Up IntelliJ IDEA.
If you skipped that lecture, or you are working on a computer that does not have IDEA fully set up, you need to point IDEA to
the git program now. No matter which operating system you use, you should set up git here by clicking on Configure...
If IDEA cannot find git it will ask you where you installed it, and offers to install it for you.
MacOS and Linux
Just type in git and IDEA will probably find it for you.
Native Windows
Friends do not let friends try to develop Scala code on native Windows.
WSL
Windows users should not click on Download or a native Windows git package will be downloaded that does not interoperate well with WSL.

WSL users should save this program to a directory called something like C:\wsl\git.bat,
and paste in the contents of the following batch file:
Now set Path to Git executable to the full path of the git.bat script, for example C:\wsl\git.bat.
You should now see:
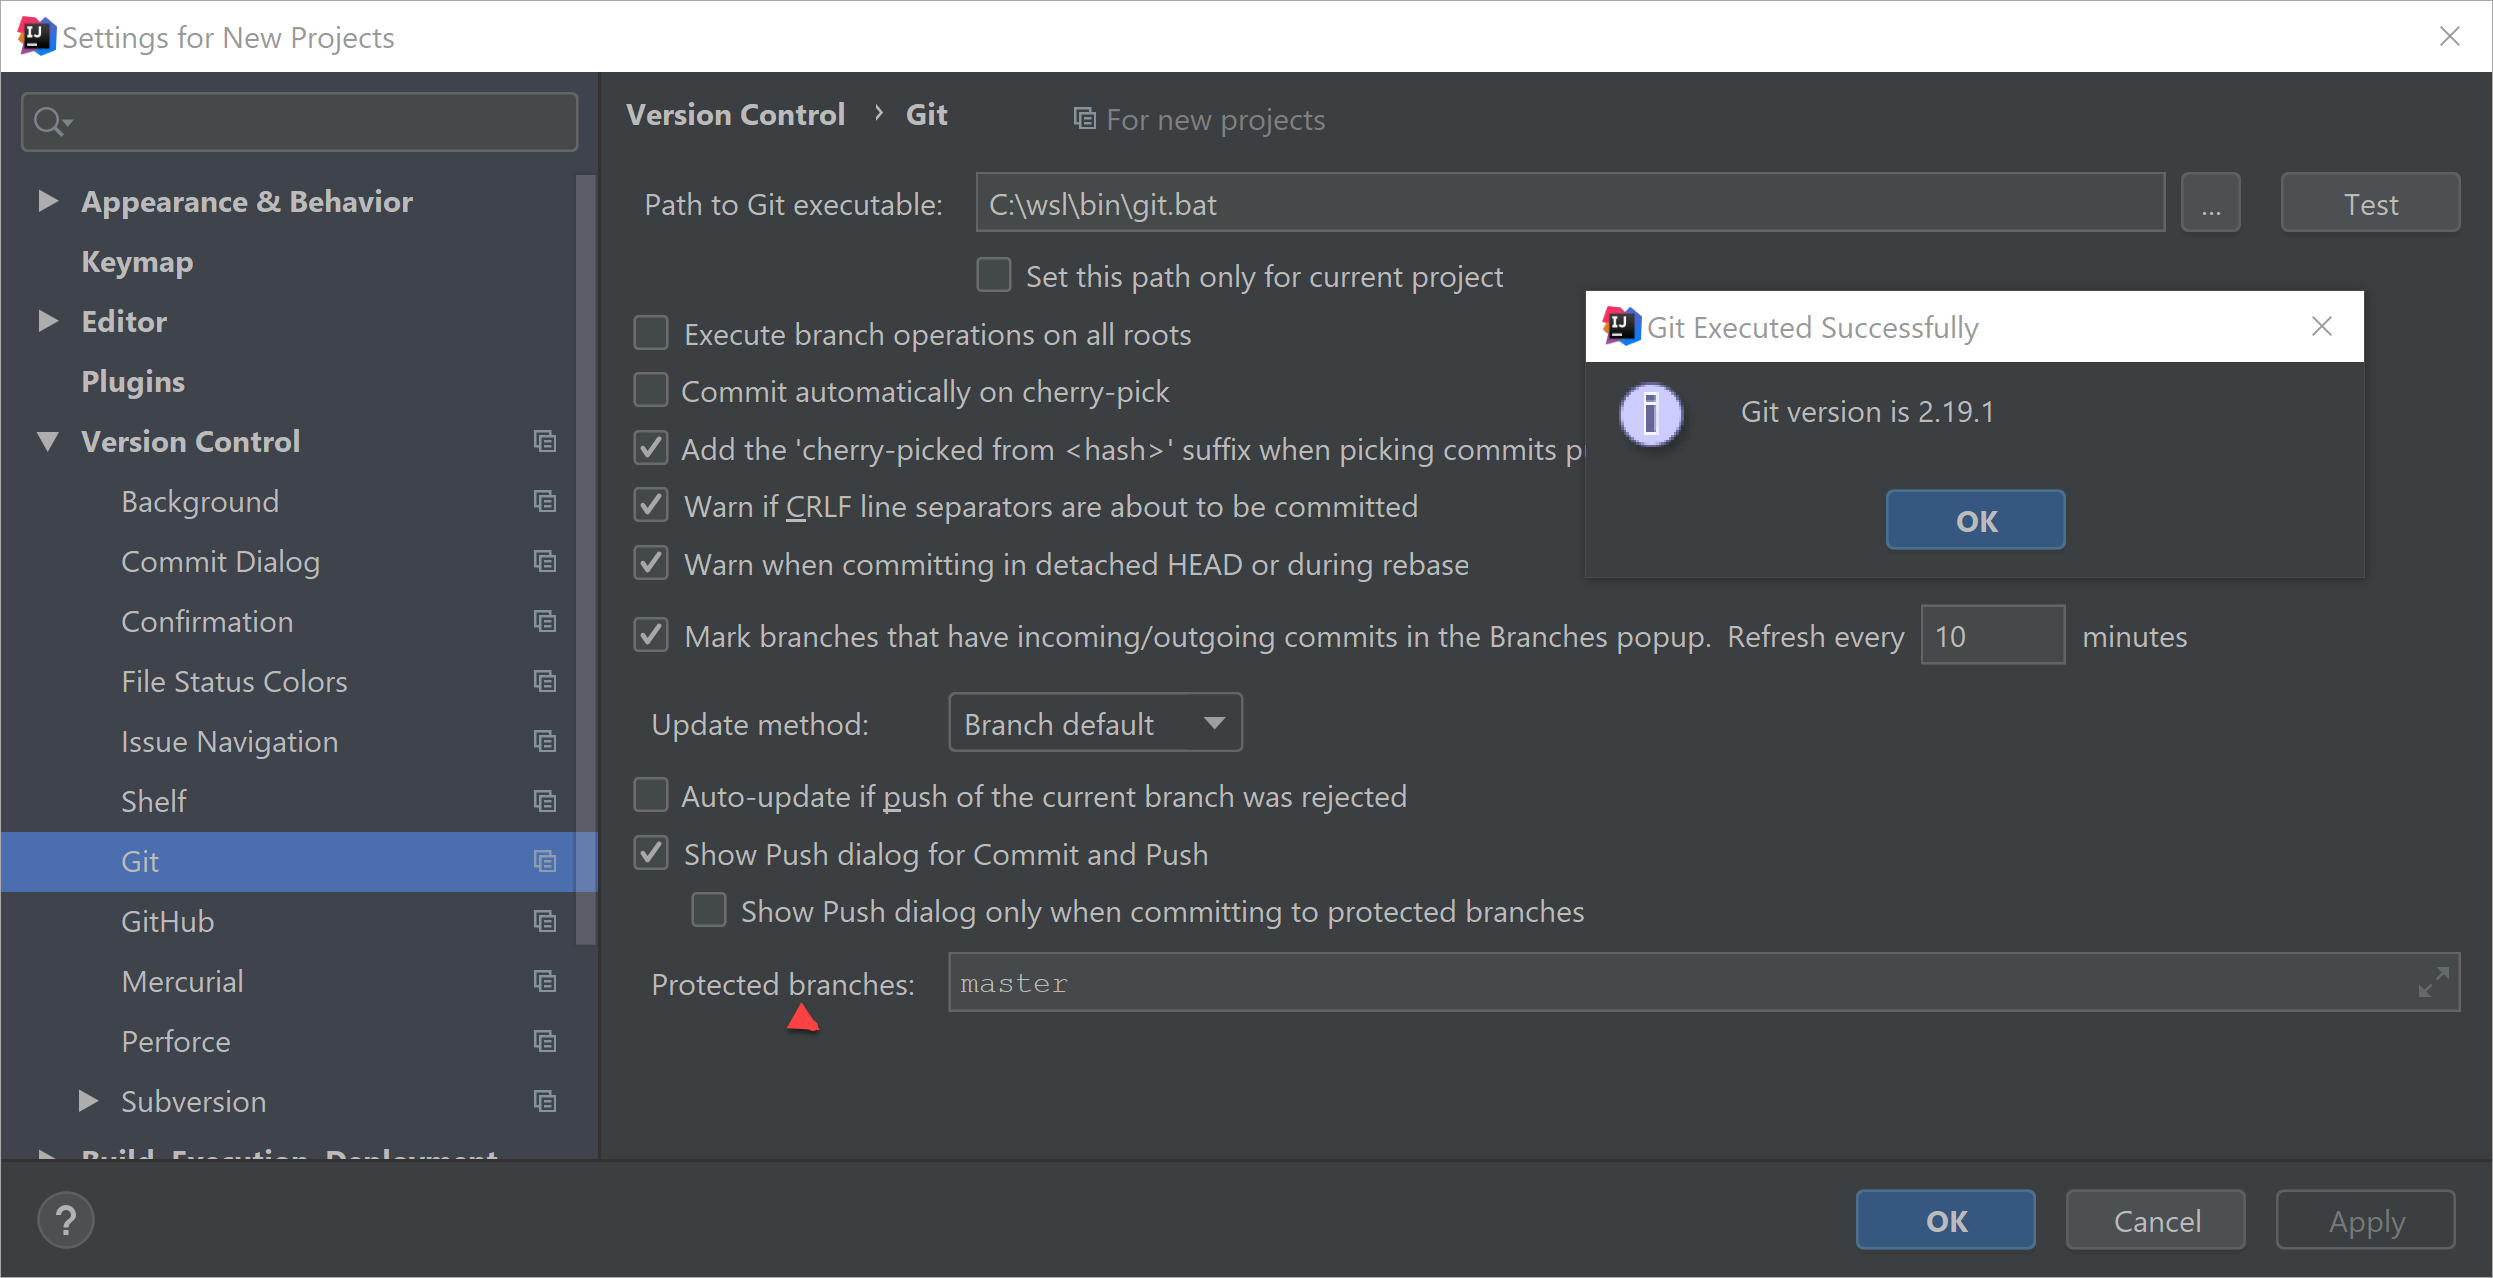
Click Test to see if IDEA found the git executable.
The SBT Panel
This side panel first showed up with IDEA 2017 and has become important to Scala programmers whose projects are built with sbt.
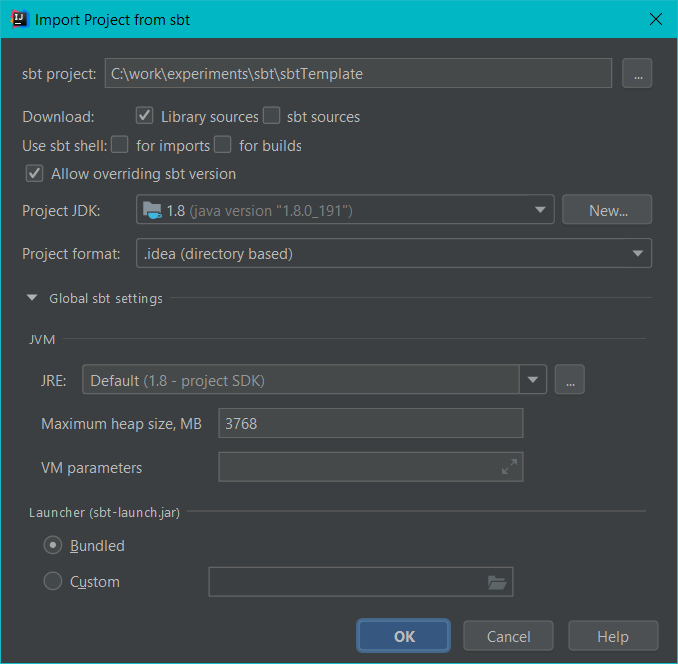
After you select the directory containing the project you want to work with, you will see the following dialog box (I unfolded the Global SBT settings subpanel):
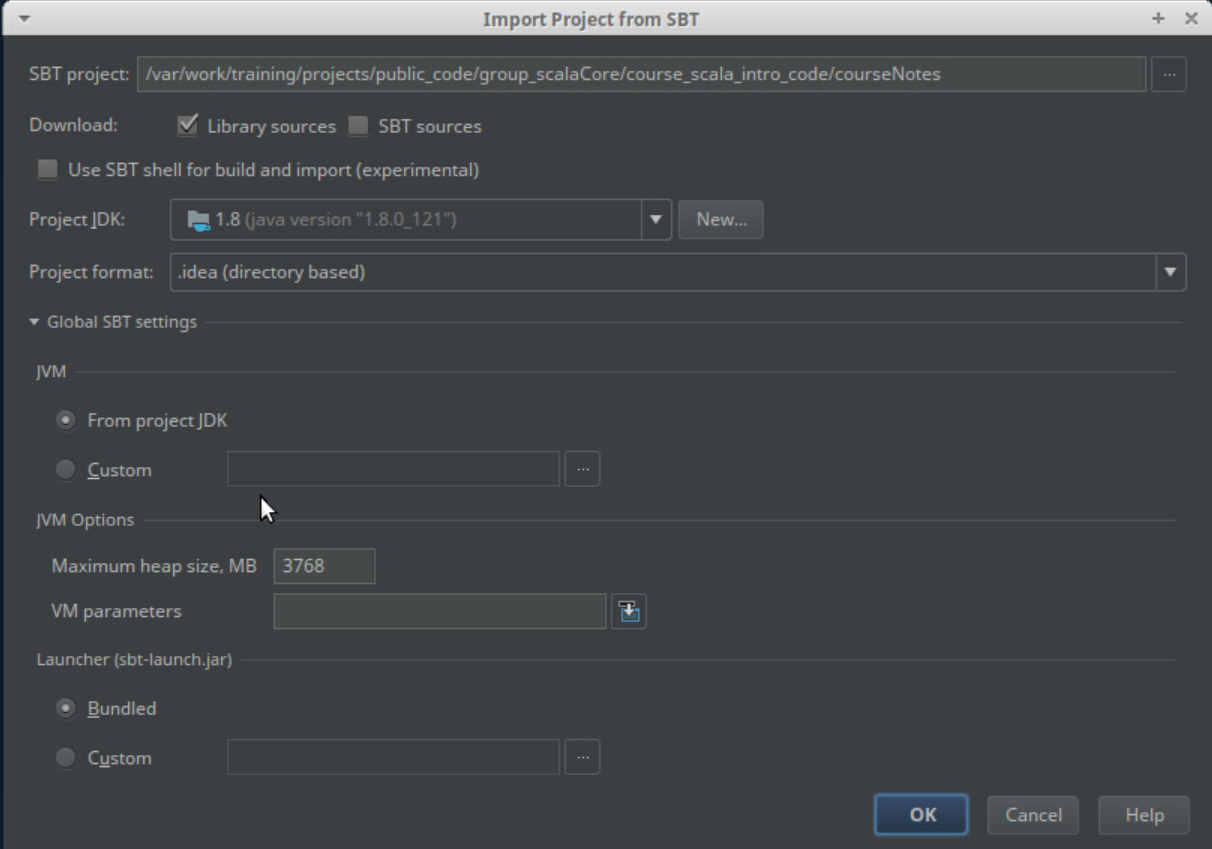
You should enable:
- Library sources – this takes longer, but having the source code for project dependencies can really help.
- SBT sources – normally you do not need to do this, so save yourself the time this adds to the project setup and do not enable it.
Also check the Project SDK; if there is a problem the default JDK name will be shown in red.
Reveal the Global SBT settings section to ensure that the JVM has enough memory to handle this project.
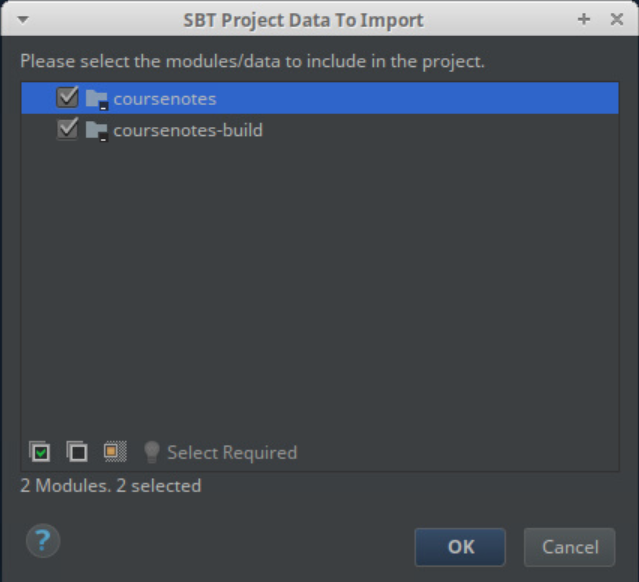
You will now be prompted to import all of the IDEA modules created from the sbt project. Just click OK.
-
File / Settings / Build, Execution, Deployment / Build Tools / sbt –
these are global settings for all
sbtprojects. -
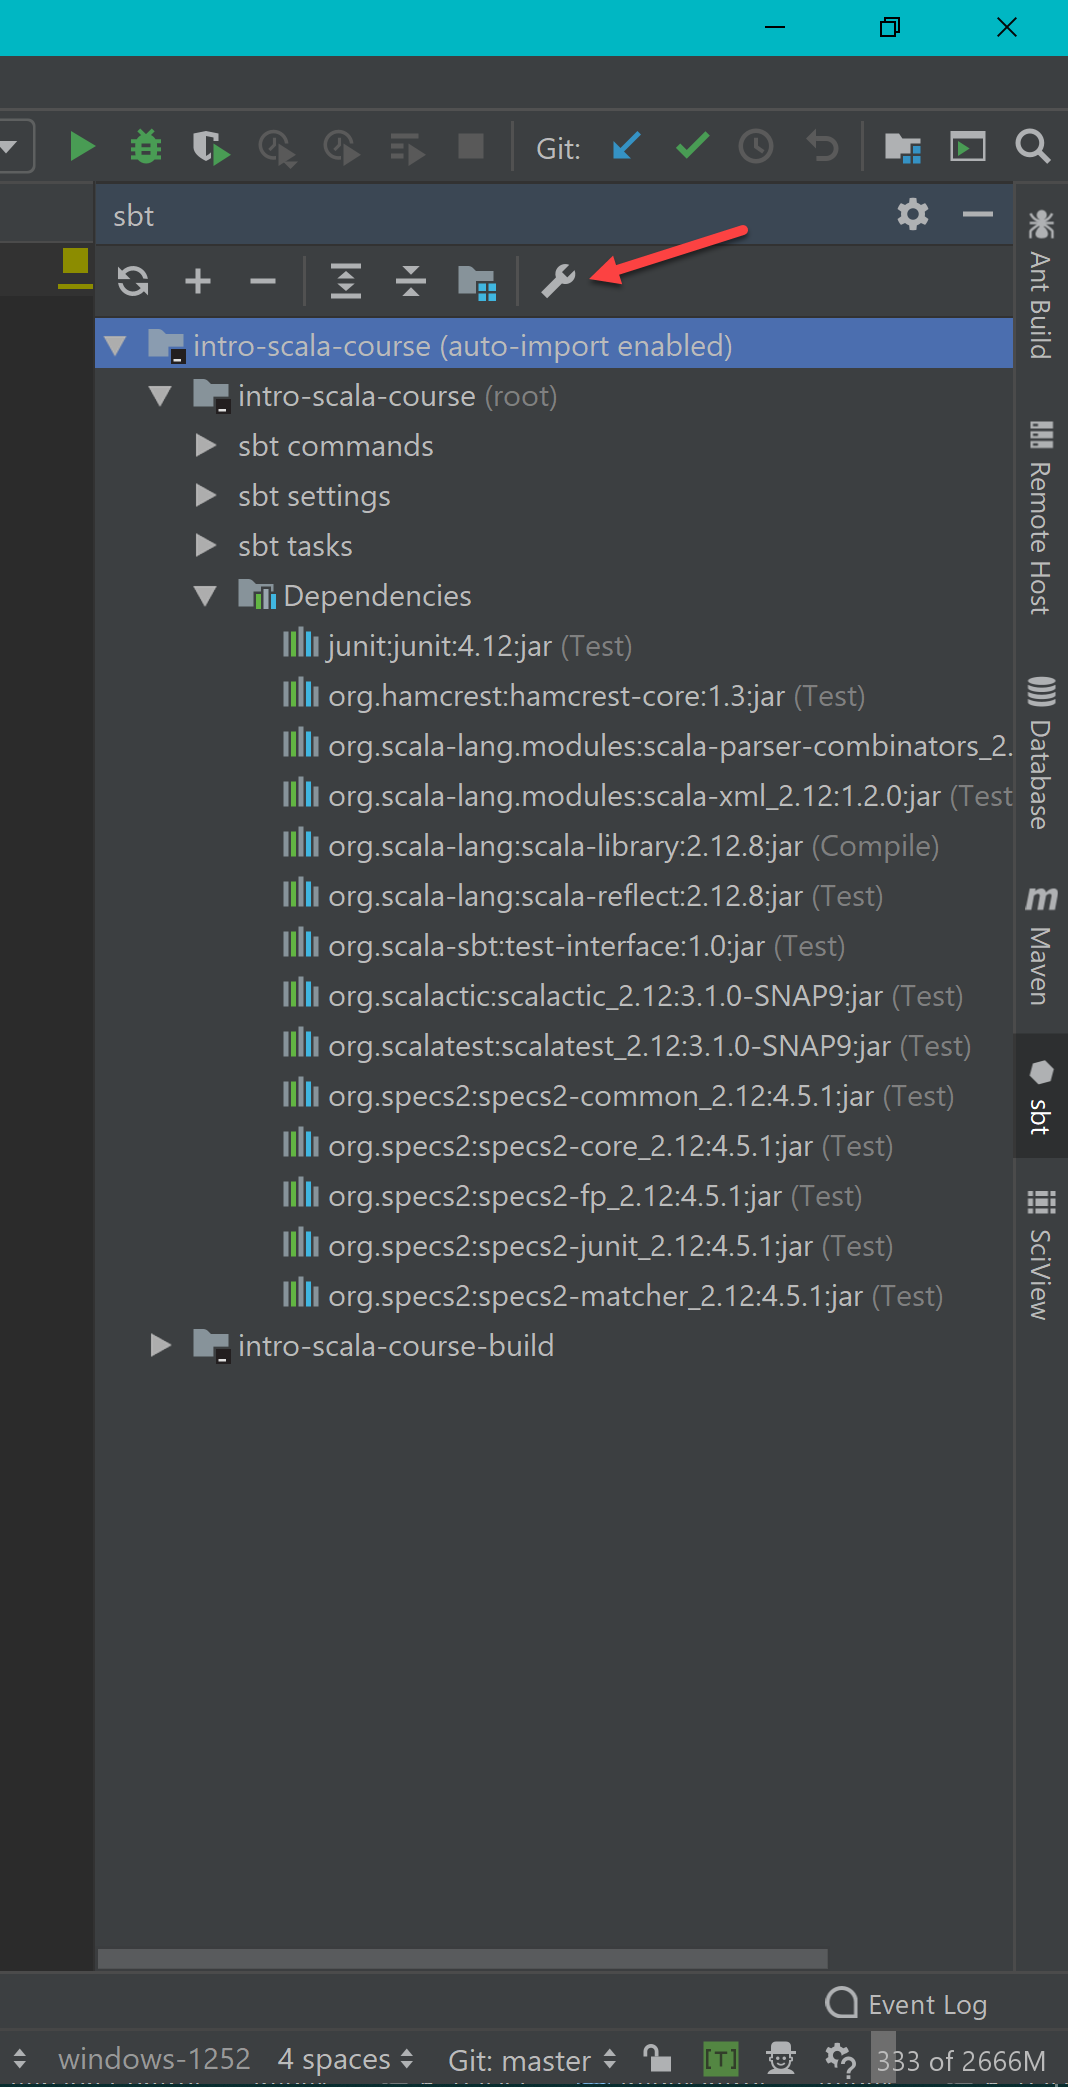
Clicking on the wrench icon at the top of a project’s
sbtpanel – these are the settings for the current project:
The sbt project settings panel looks like the following.
You can tell this is for a specific project, and is not for global settings,
because of the blue bar with the name of the project that the settings pertain to:
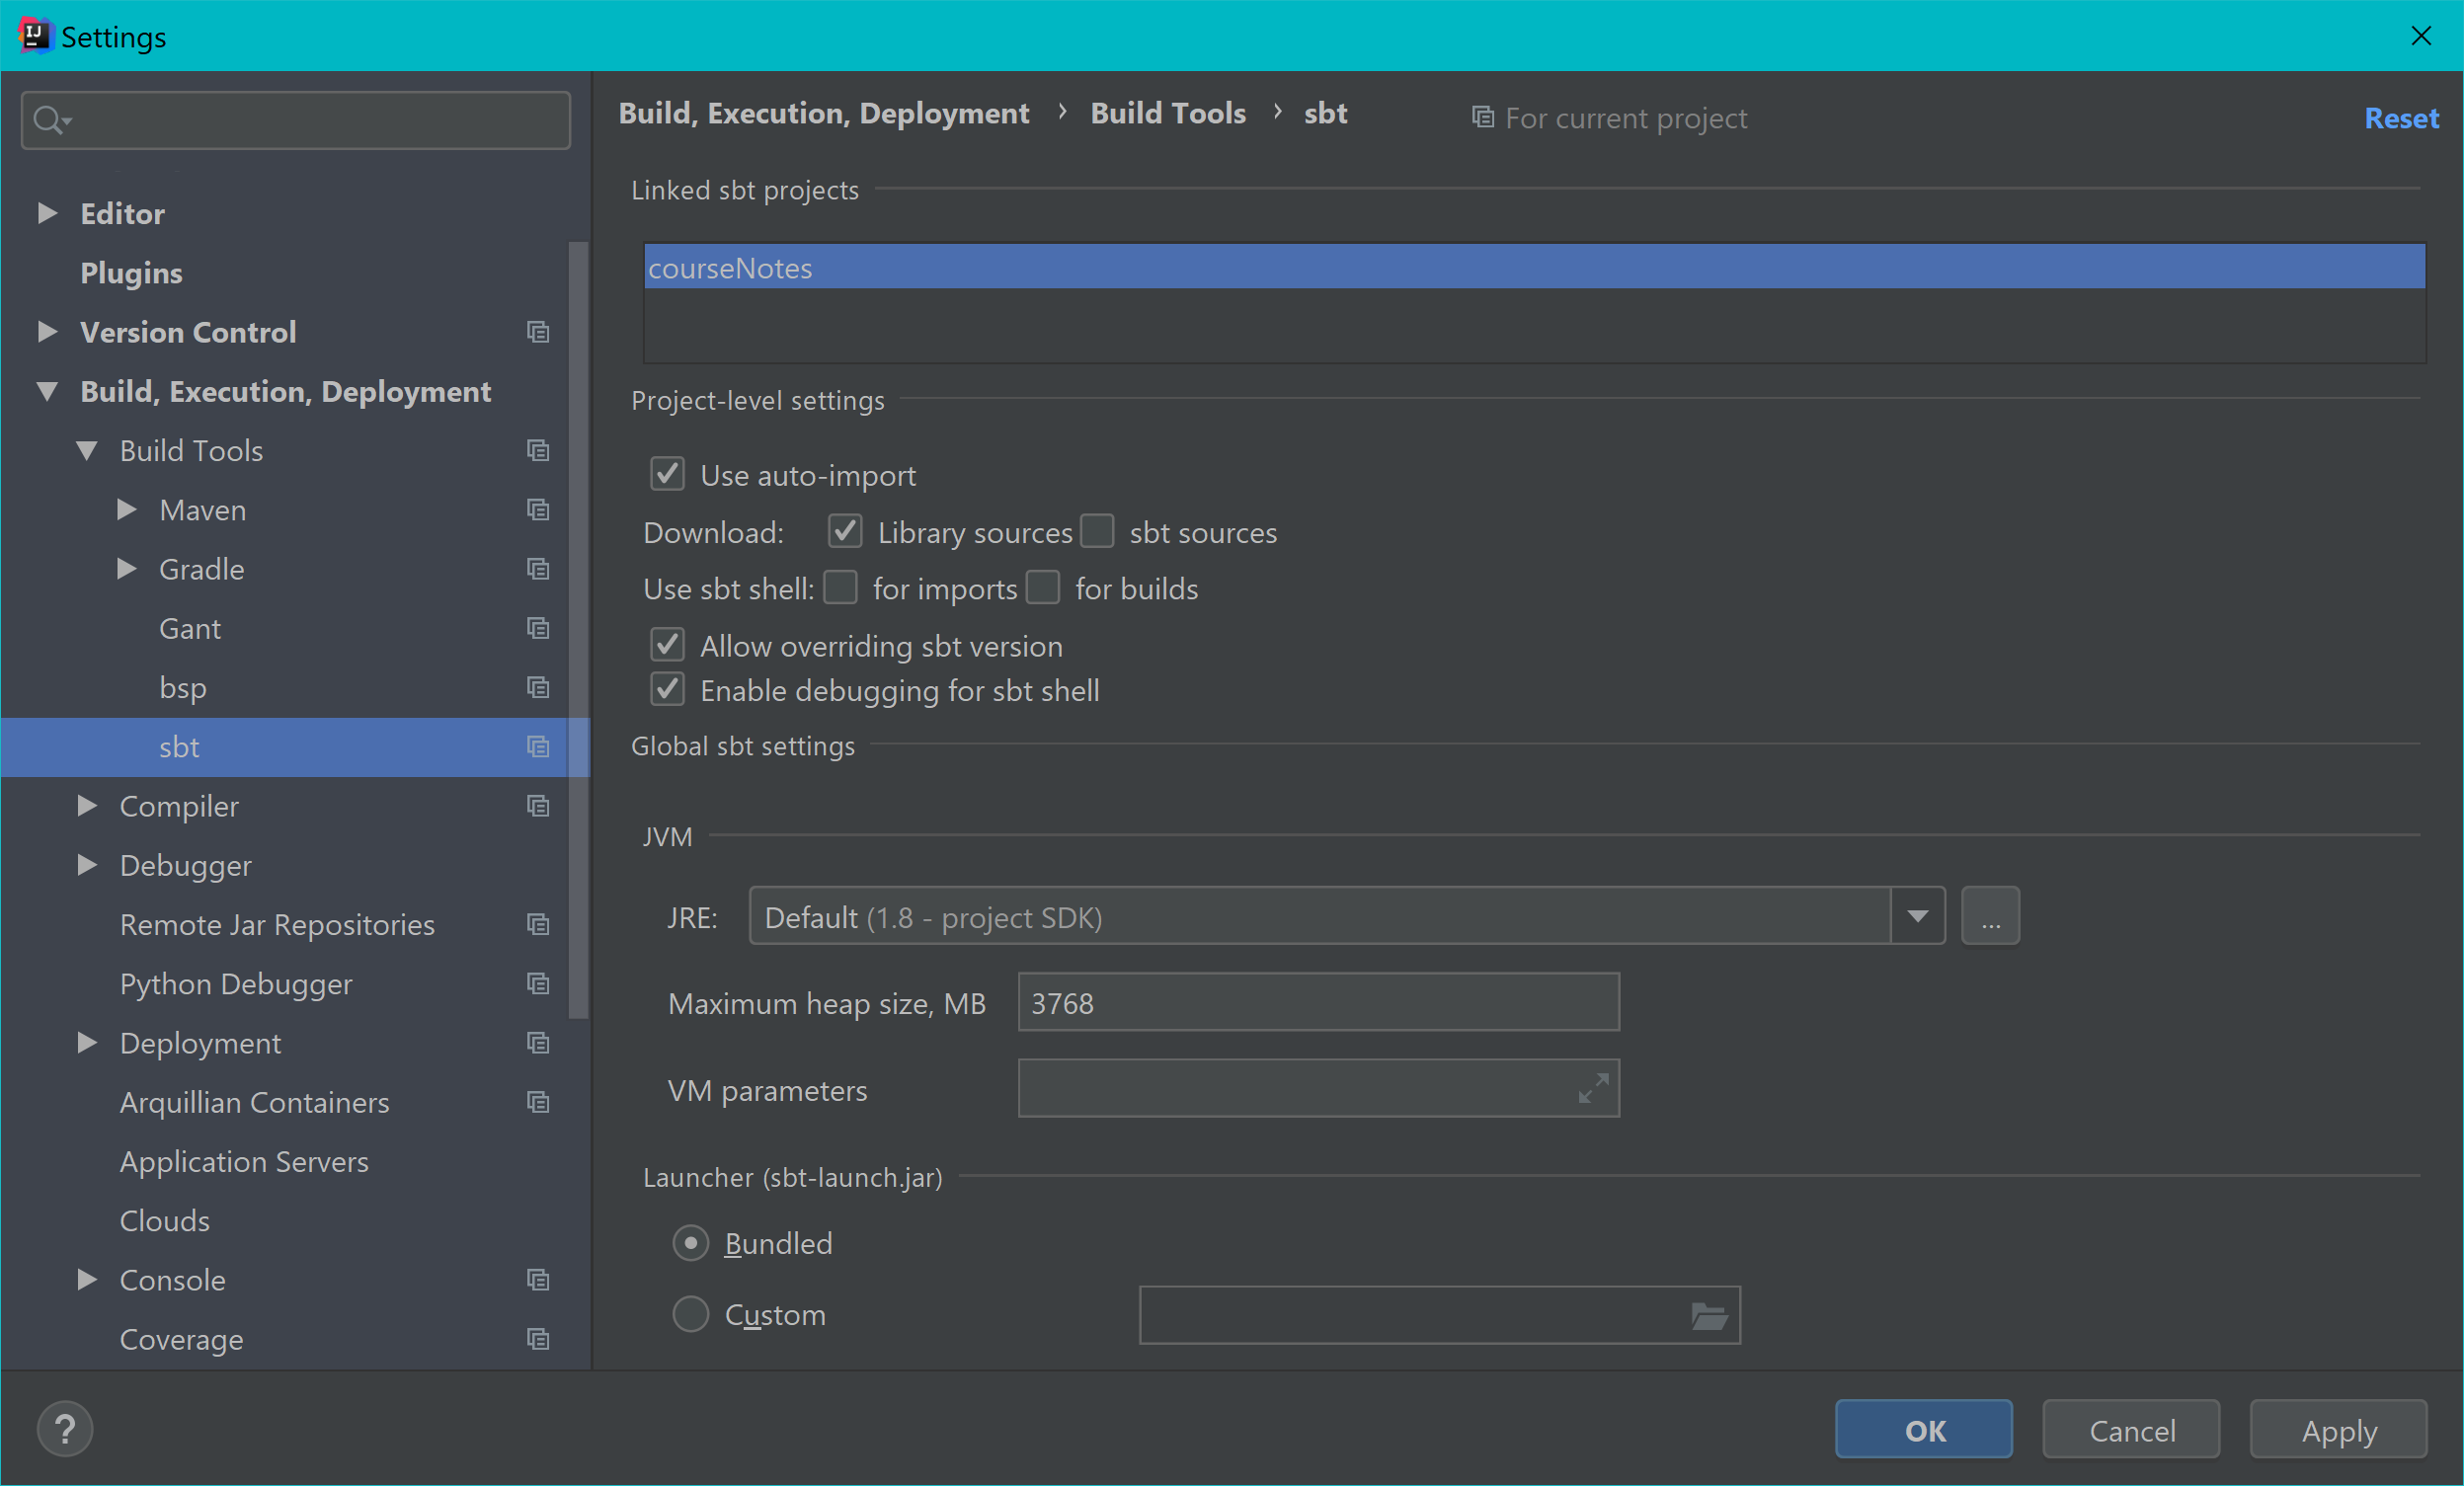
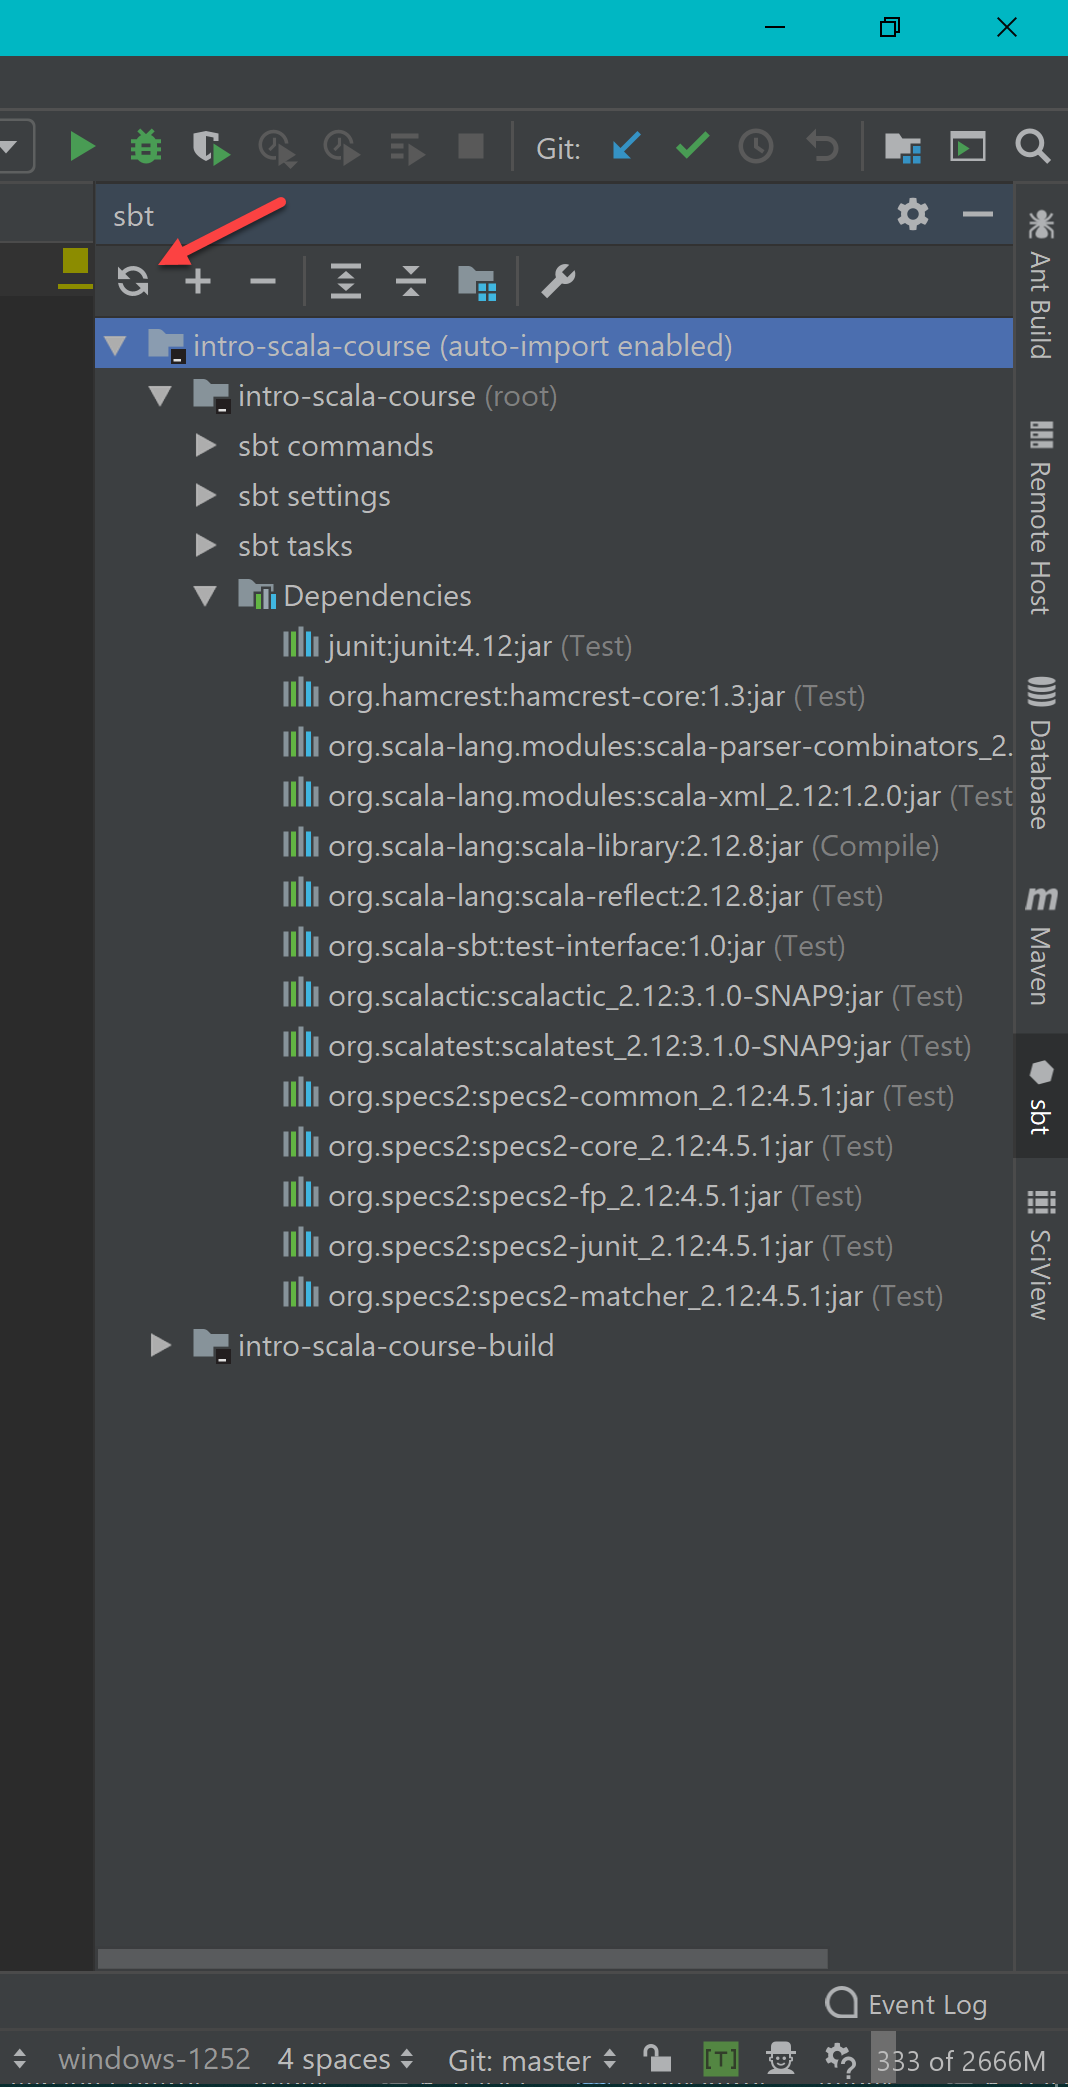
I recommend that you always enable Use auto-import.
This should be the default.
Saves you much aggravation because the meta-project is automatically rebuilt whenever one of the .sbt files that define it changes.
You can also cause the meta-project to be rebuilt on demand by clicking the recycle icon at the top left of the sbt panel.
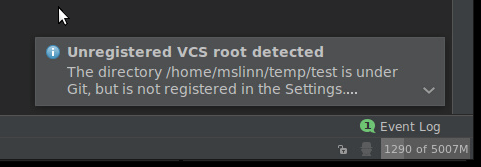
Shortly thereafter you will see this popup at the lower right of the screen.
It is an annoyance and in no way makes your life better.
IntelliJ IDEA wants you to click the down arrow at the right bottom, then Add root.
This registers the git project with IDEA.
I am unaware of any significant benefit from doing this.
Reopening a Project
The IDEA window shows a list of previously opened projects on the left. I worked with IDEA for eight years before accidentally discovering that an entry can be removed by hovering over an entry and pressing the backspace key.
Converting SBT Projects Into IntelliJ Projects
This section discusses how to work with IntelliJ IDEA on Scala projects in a more traditional manner,
instead of opening sbt projects directly.
This might be required if you are using an old version of IDEA, or if you have a complex sbt setup.
In order for this to work, you must install the sbt-idea plugin for SBT, as described in the
SBT Global Setup and
SBT Project Setup lectures.
At the command line, navigate to the course_scala_intro_code/courseNotes directory.
/
To export the courseNotes SBT project to IDEA, run this command:
$ sbt "gen-idea no-classifiers"
The no-classifiers option to the gen-idea command prevents source code and JavaDoc being downloaded for SBT plugins.
This is a good idea because you rarely need them, and they downloading them takes a long time.
If this is the first time you run sbt with this project you will have to wait several minutes while many dependencies are downloaded.
Eventually you will see something like:
[info] Loading global plugins from /home/mslinn/.sbt/0.13/plugins
[info] Updating {file:/home/mslinn/.sbt/0.13/plugins/}global-plugins...
[info] Resolving org.fusesource.jansi#jansi;1.4 ...
[info] Done updating.
[info] Set current project to temp (in build file:/home/mslinn/temp/)
[info] Creating IDEA module for project ’temp’ ...
[info] Updating {file:/home/mslinn/temp/}temp...
[info] Excluding folder target
[info] Created /home/mslinn/temp/.idea/IdeaProject.iml
[info] Deleted existing library files
[info] Created /home/mslinn/temp/.idea
[info] Excluding folder /home/mslinn/temp/target
[info] Created /home/mslinn/temp/.idea_modules/temp.iml
The Scala plugin for IDEA creates two directories,
named .idea and .idea_modules.
Both of these directories should be mentioned in the .gitignore file of every git project.
You can examine the .gitignore files provided with the projects for this course.
IDEA 14 and later display a message that says:
gen-idea tool,
which currently relies on a legacy Scala project model.
Please consider using built-in sbt support via the import project action.
If you click on the import action link you will start the process described in the previous section,
which discards the work done by gen-idea.
Web Browser / GitHub / JetBrains Toolbox Integration
If you have JetBrains Toolbox installed you will see a small IDEA button on GitHub project web pages:
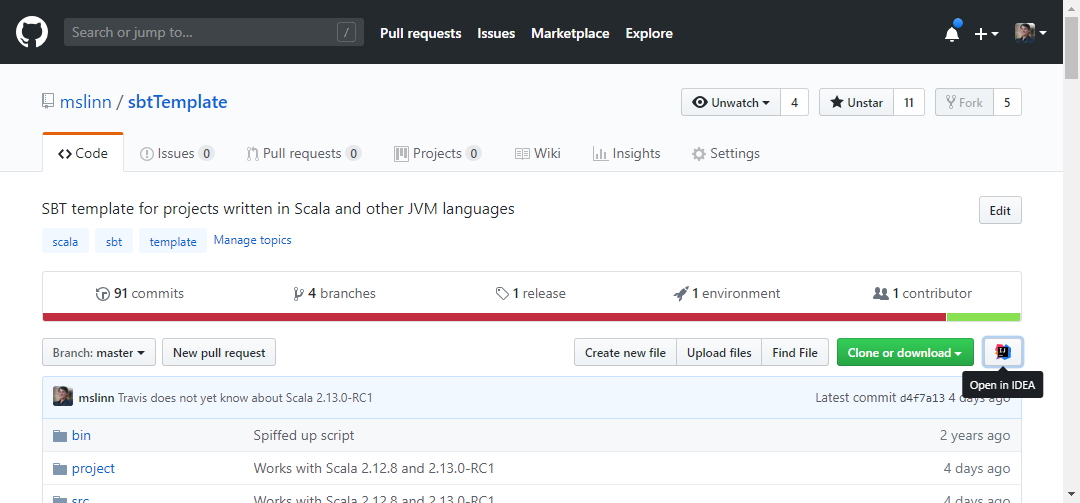
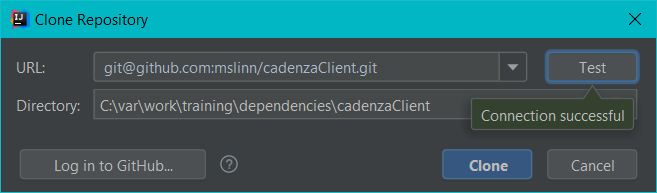
Clicking on the Open in IDEA button shows:
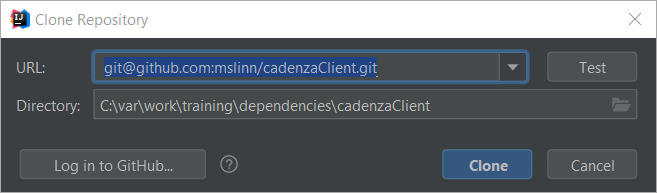
If you click on the Test button the git URL is tested, which verifies that your git client associated with IDEA works and you have Internet connectivity.
I clicked the Log in to GitHub... button:
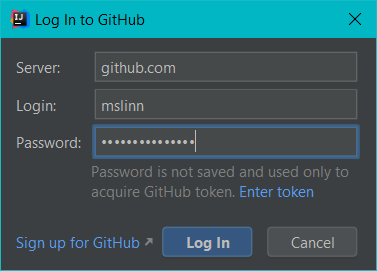
The 2 factor authentication I had set up kicked in, and I used Google Authenticator to provide me with a token to enter:
The repository was fetched:

After a while the fetch ended, and IDEA asked if I wanted an IDEA project to be created from the downloaded git project:

Now I was presented with the familiar Import Project from sbt dialog we have seen before. I clicked OK.
JetBrains Toolbox Browser Plugin
In case you were wondering, the IDEA button is not served by github.com, it is generated by a plugin.
The button’s URL uses the jetbrains protocol, not https, and the JetBrains IDE Support extension registers as a handler for that protocol.
This is the Google Chrome plugin notification dialog:
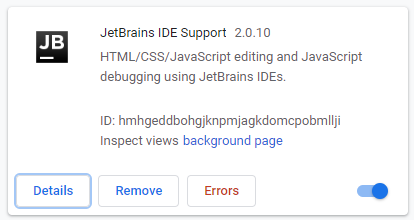
Clicking on the Details button shows:
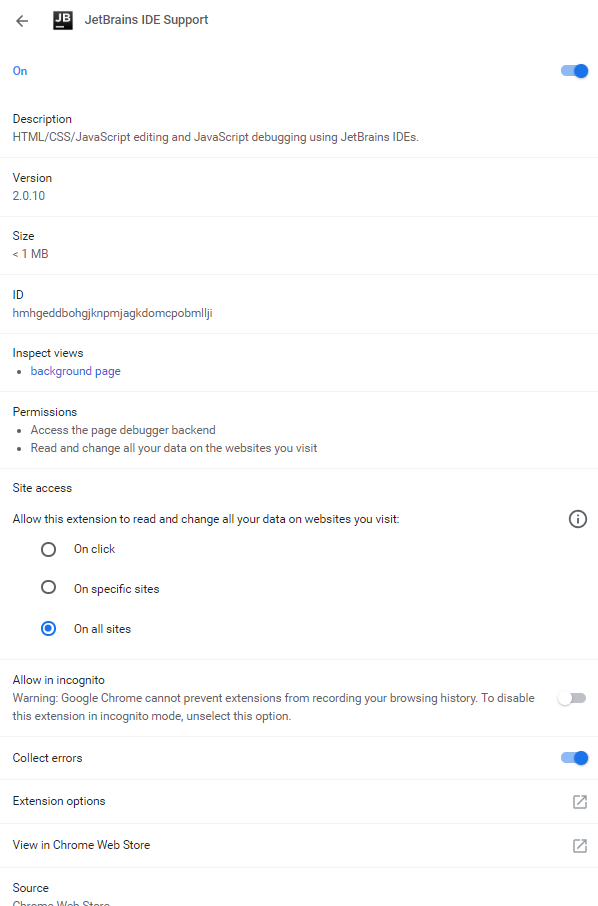
Clicking on On specific sites shows:
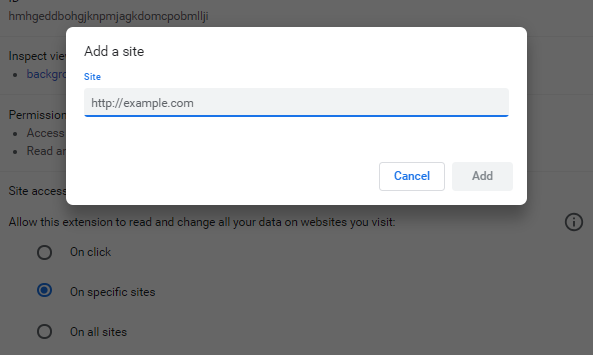
It seems to me that it would make sense from a security point of view to lock that plugin’s activity down to https://github.com.
When I tried that the plugin continued to work fine.
Creating a New Project Using IDEA
This is an alternative way of creating a Scala-based project from IDEA, instead of creating an sbt project as I just showed you.
I’ll explain the pros and cons as we go along.
I’ll also show you how to launch the program in debug mode, and check a run configuration into source control.
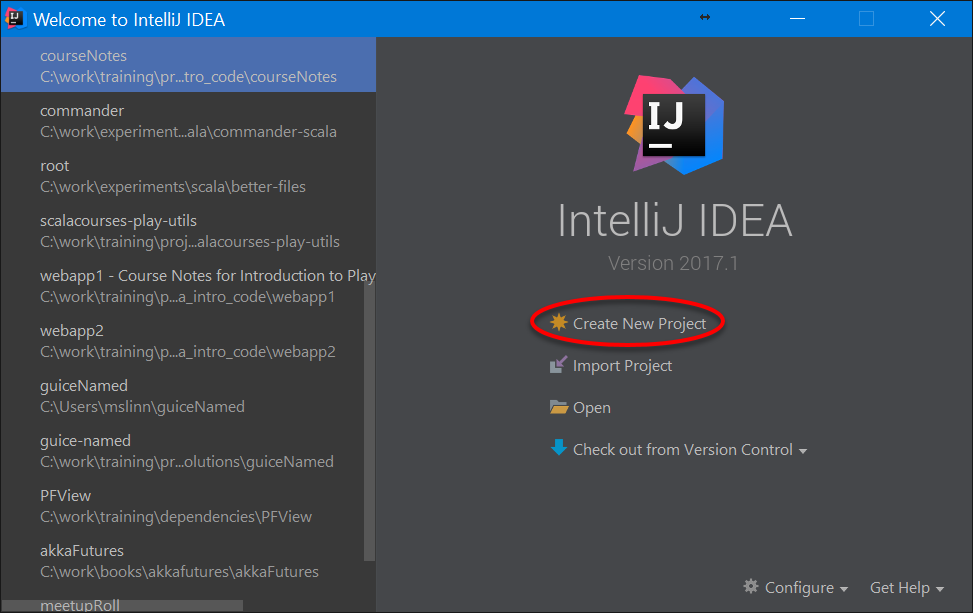
| 1) Start IntelliJ IDEA, and click on Create New Project. |
|
| 2) Select the type of Scala project |
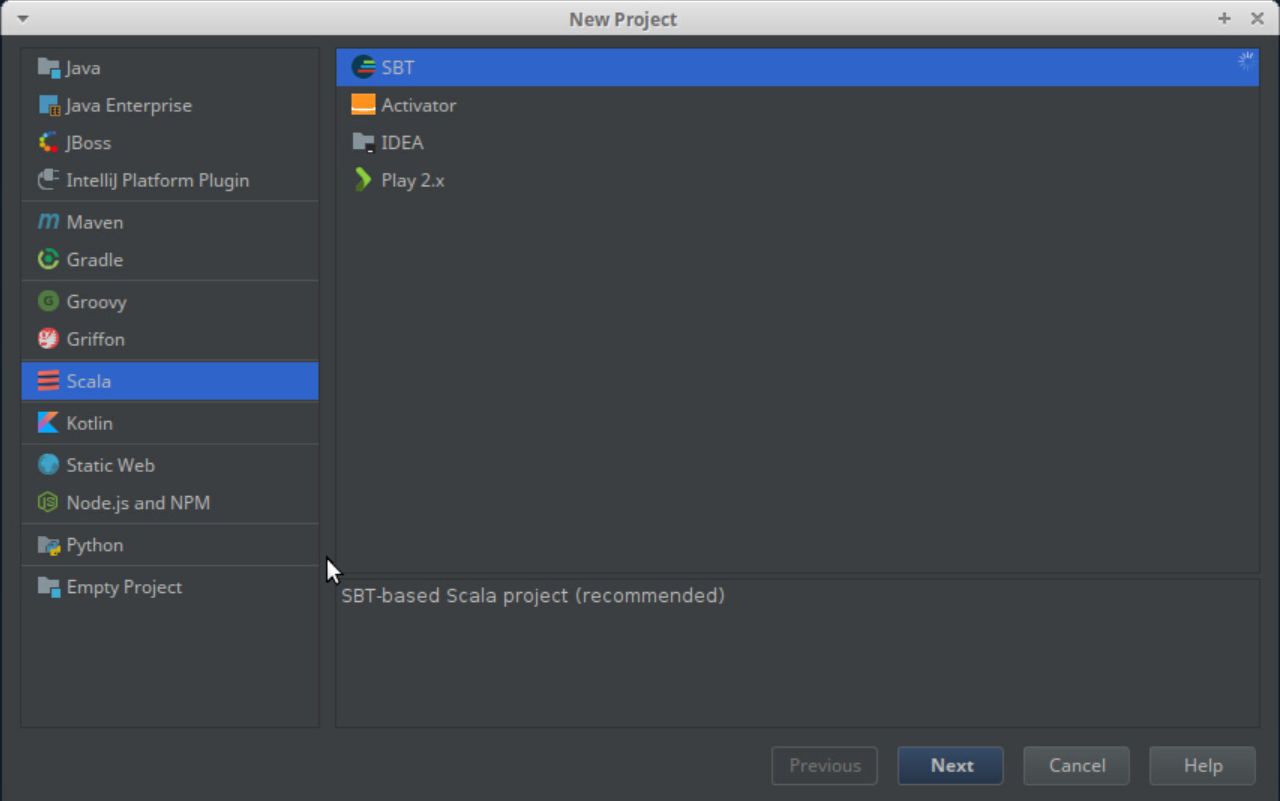
SBT: Select this to create an SBT project and import it into IDEA by using a GUI instead of the command line. IDEA: Not recommended because it uses the proprietary IDEA build system, which is not commonly used on Scala projects. |
| 3) Give your new project a name. |
If you opted to create a new sbt project you will see the following dialog:
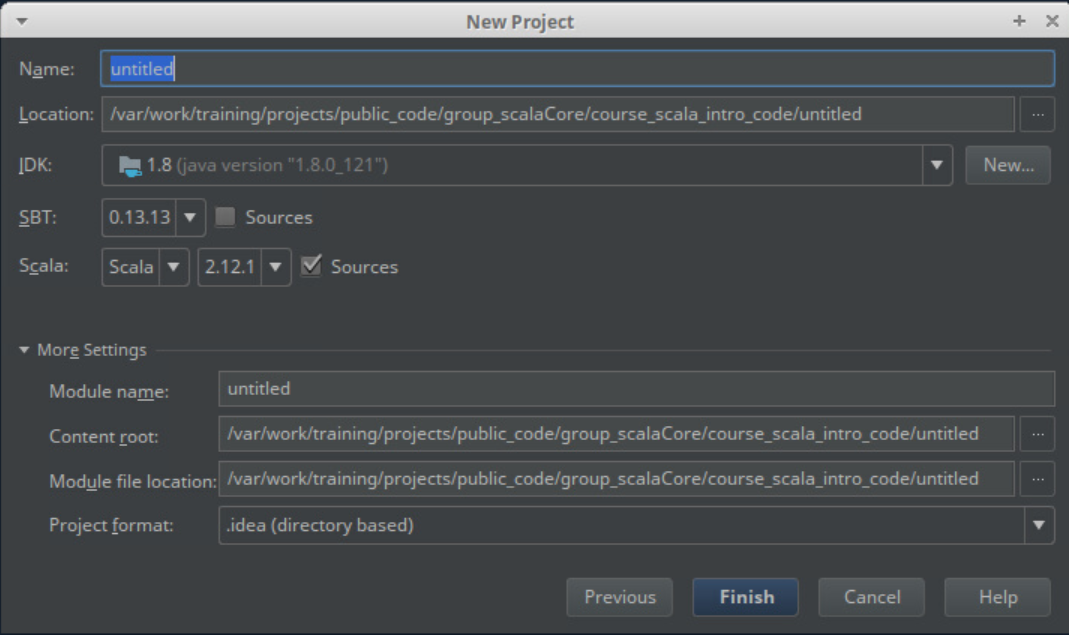
The Name: field is for the name of the project. Make it unique because that will help you open the project you want easily in the future. The Location: field is for the root of the project. The JDK: field determines the JDK for the project. Newer versions are always better. The SBT: field determines the version of sbt used for the project.
Newer versions are always better.
There is usually no need to enable Sources; that just slows down the creation and any subsequent update to the project.
The Scala: section contains two field: the compiler generation (Scala or Dotty), and the compiler version. Dotty is the next generation version of Scala (still in the experimental stage). We don’t talk about Dotty in this course yet because it is too early. Rest assured, when we judge the time is right we will jump on it! Most people should select Scala, and enable Sources so the source code for your projects dependencies will be readily available when you need to debug a problem. I recommend you do not modify the More Settings section. 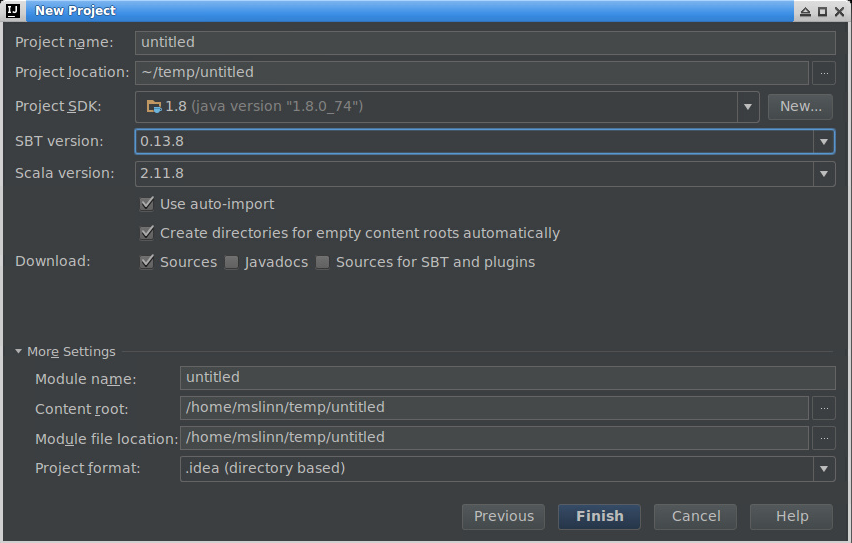
As previously mentioned, you can adjust these settings later by using the File / Settings / Build, Execution, Deployment / Build Tools / SBT dialog. |
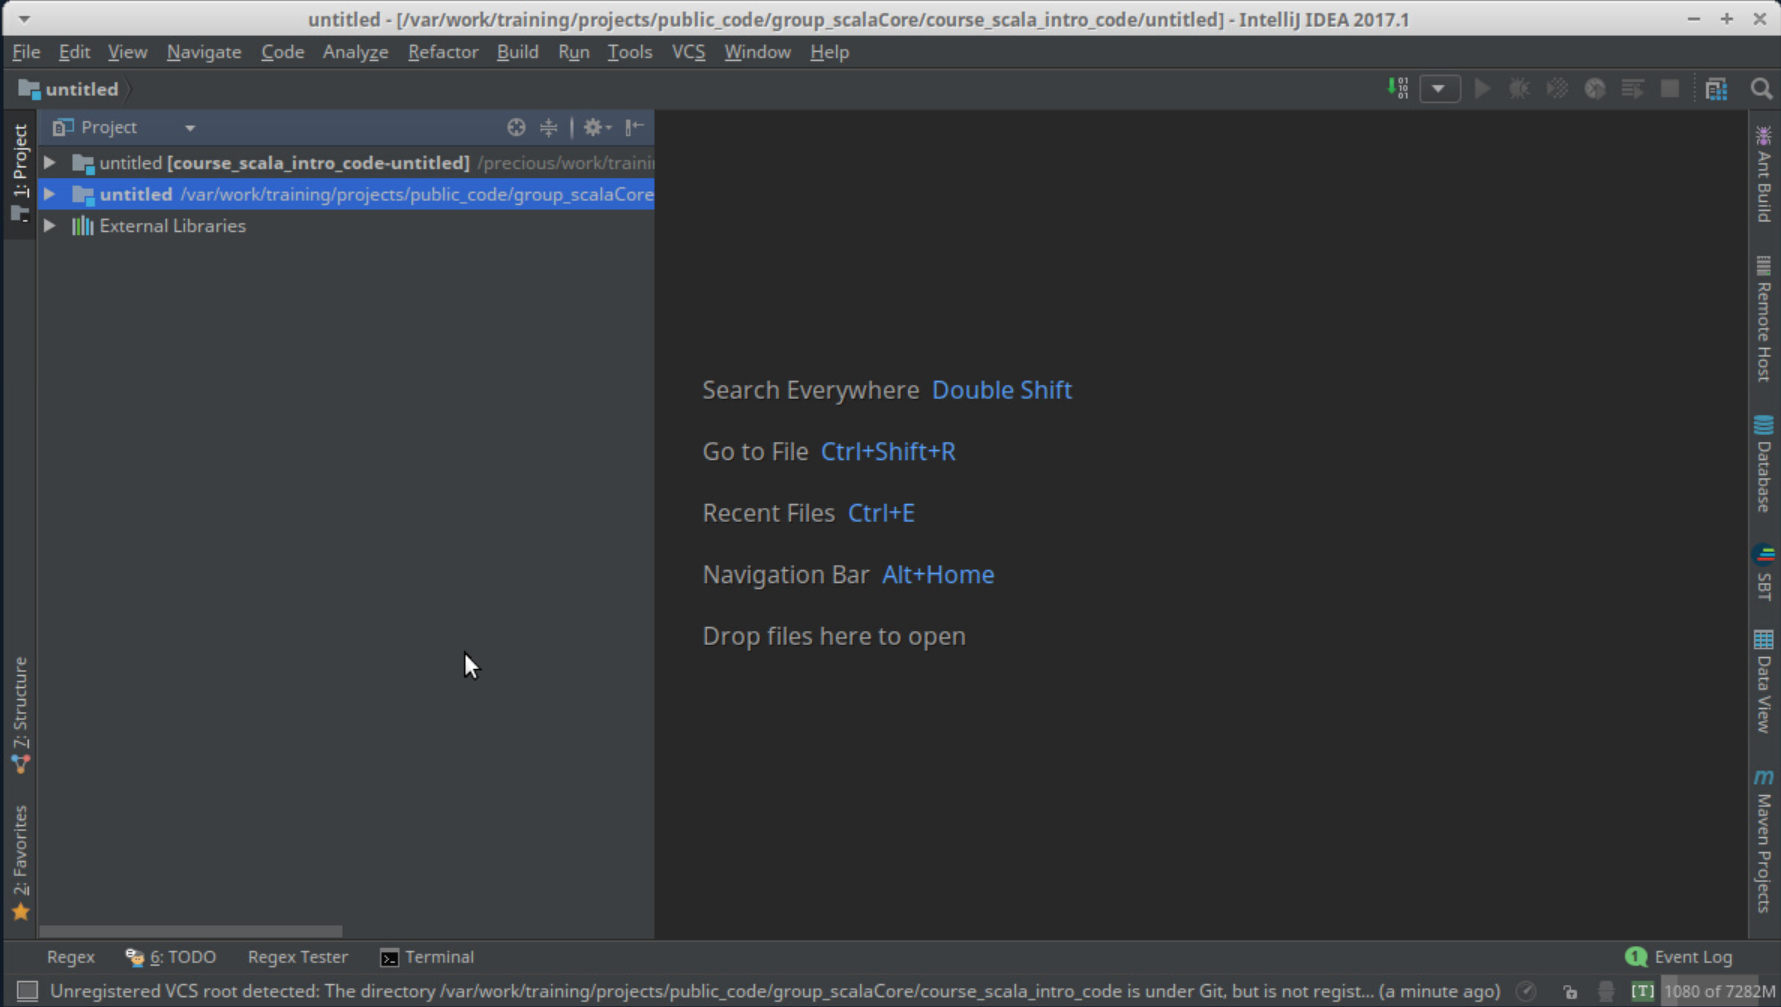
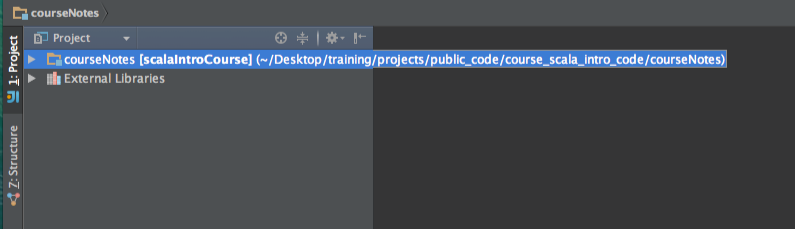
4) After a moment the Project panel will open up. Click on the module name to open it.
The top one or two directories are the .idea* directories; normally you should not need to look inside.
| 
|
<>
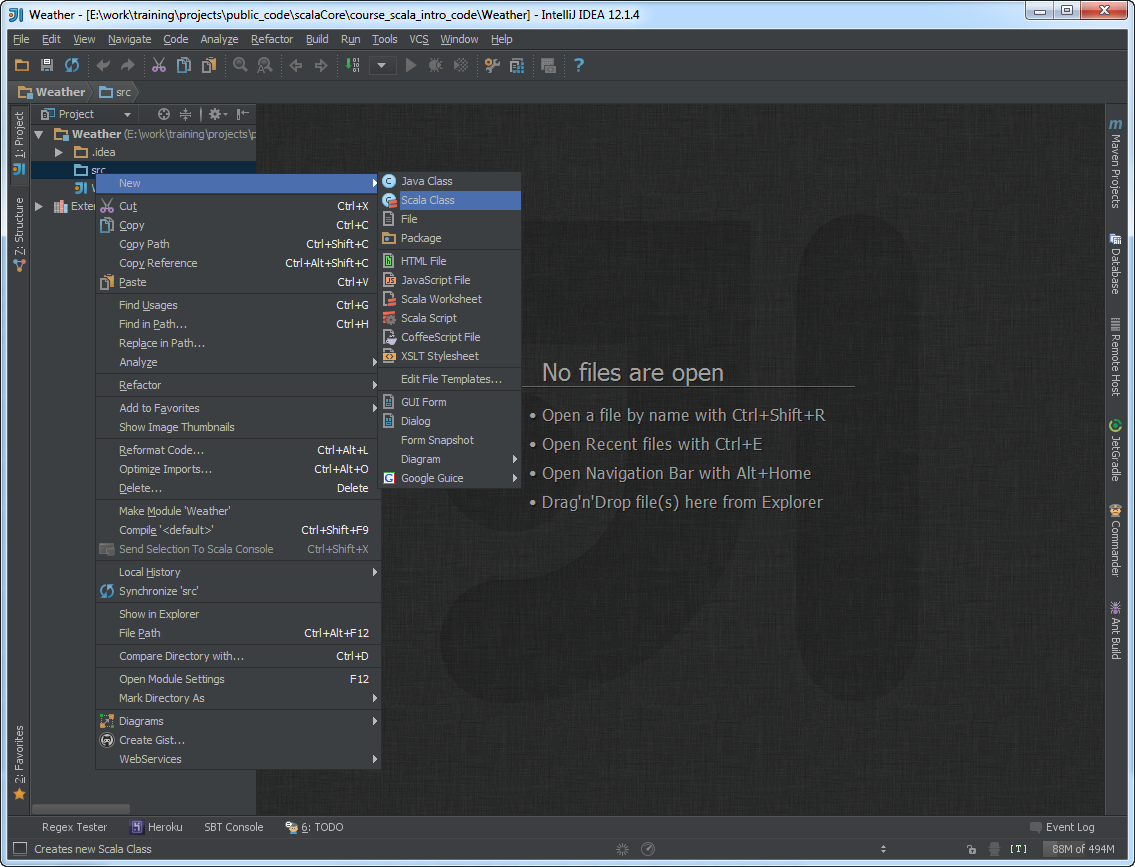
5) The src directory is automatically created for you.
This directory contains your source code, including Java and Scala code, and can also include resources.
To make a source file inside it, right-click on the src directory, select New and then Scala Class.
We select Scala Class even if we want to make a Scala object or a Scala case class.
| 
|
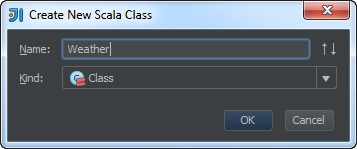
6) Give your new Scala file a name.
The Scala file will have a .scala file type automatically added.
| 
|
| 7) IDEA creates a default Scala class with the name of the file. | 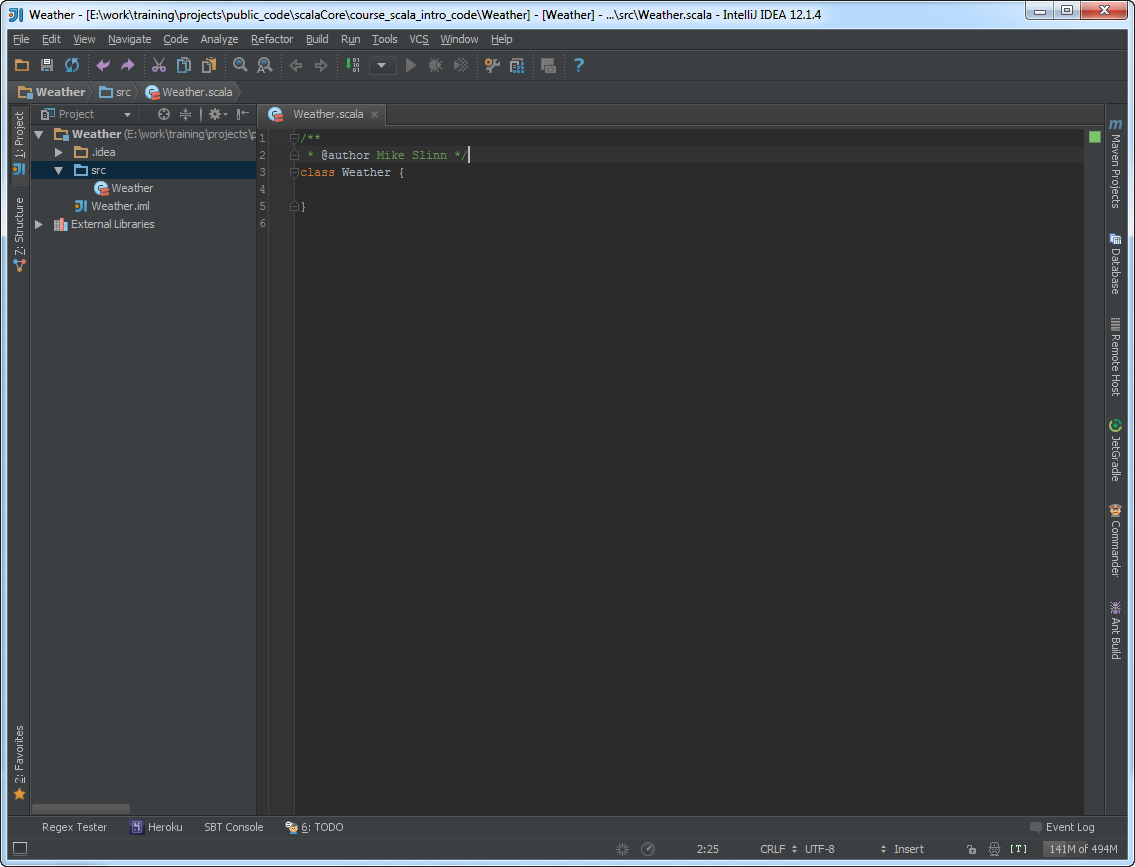
|
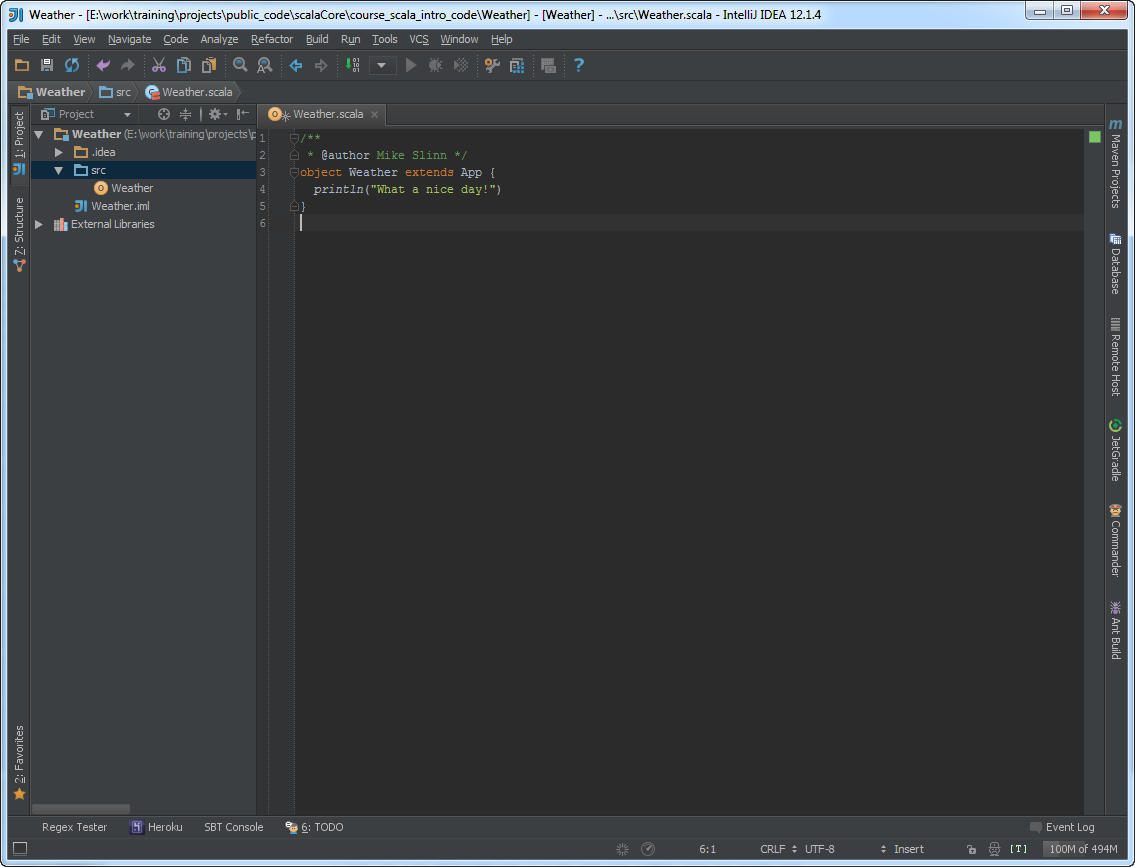
8) We need a main method for our console application.
This means we need to extend an object (not a class) with the App trait.
Change the word class to object and add extends App.
The constructor for the object consists of only one line, which prints the traditional Hello, world!
| 
|
| 9) The initial contents of the file are defined by the Scala Object template, which you can edit by going to Settings / Editor / File and Code Templates and selecting Scala Object. | 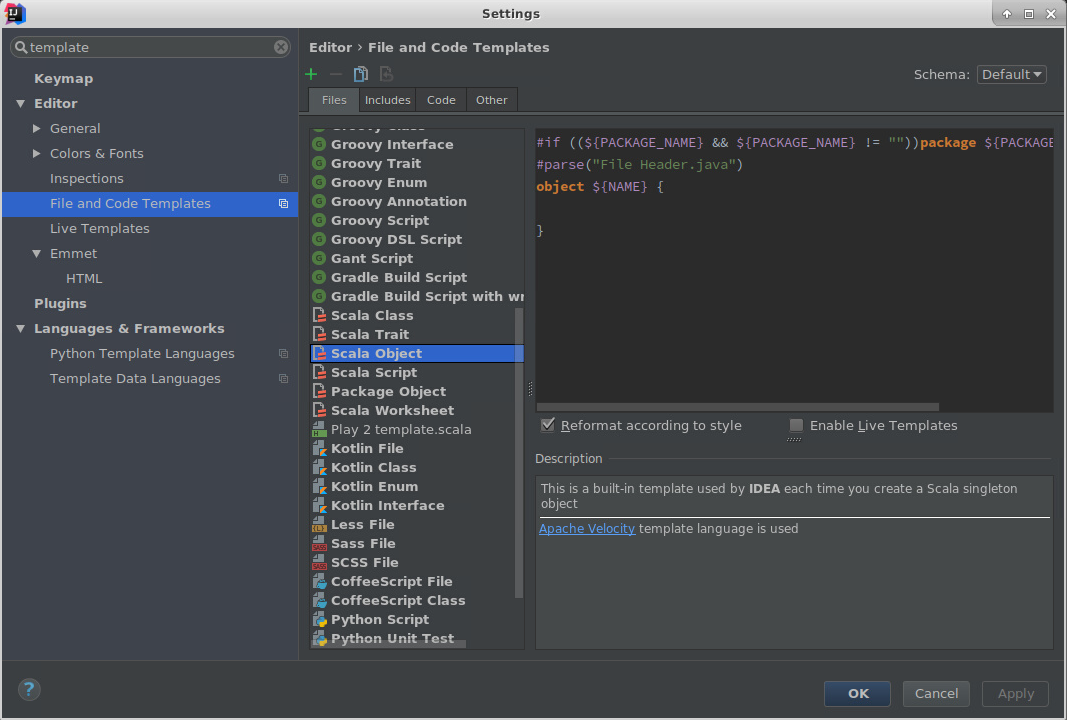
|
| 9) Let’s run the console app by right-clicking on it in the Project panel and selecting Debug Weather.main(). | 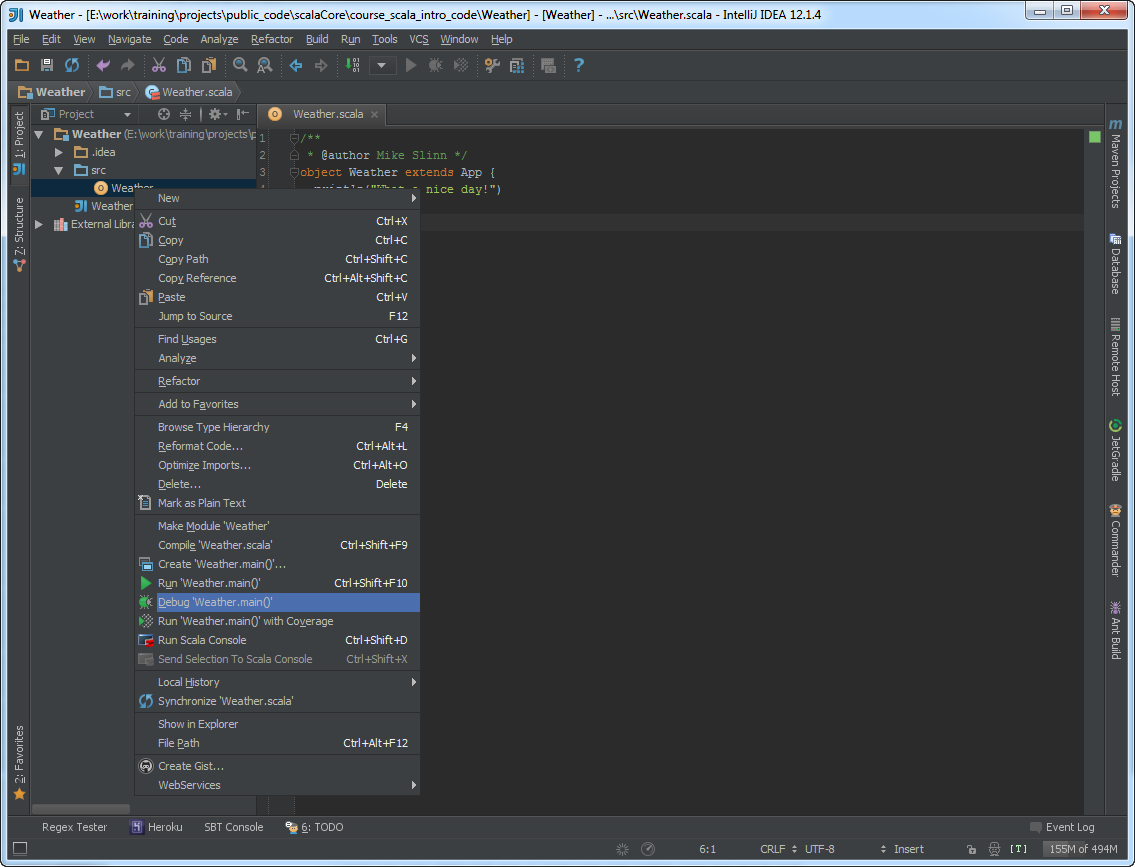
|
|
10) While IDEA builds, you will see the status line at the bottom of the screen shows all the actions performed. Output appears in the Debug panel which opens up at the bottom of the IDEA window. You can click on the Debug tab to show or hide the Debug panel. You can rerun the app by clicking on the little green bug on the left side of the Debug panel. | 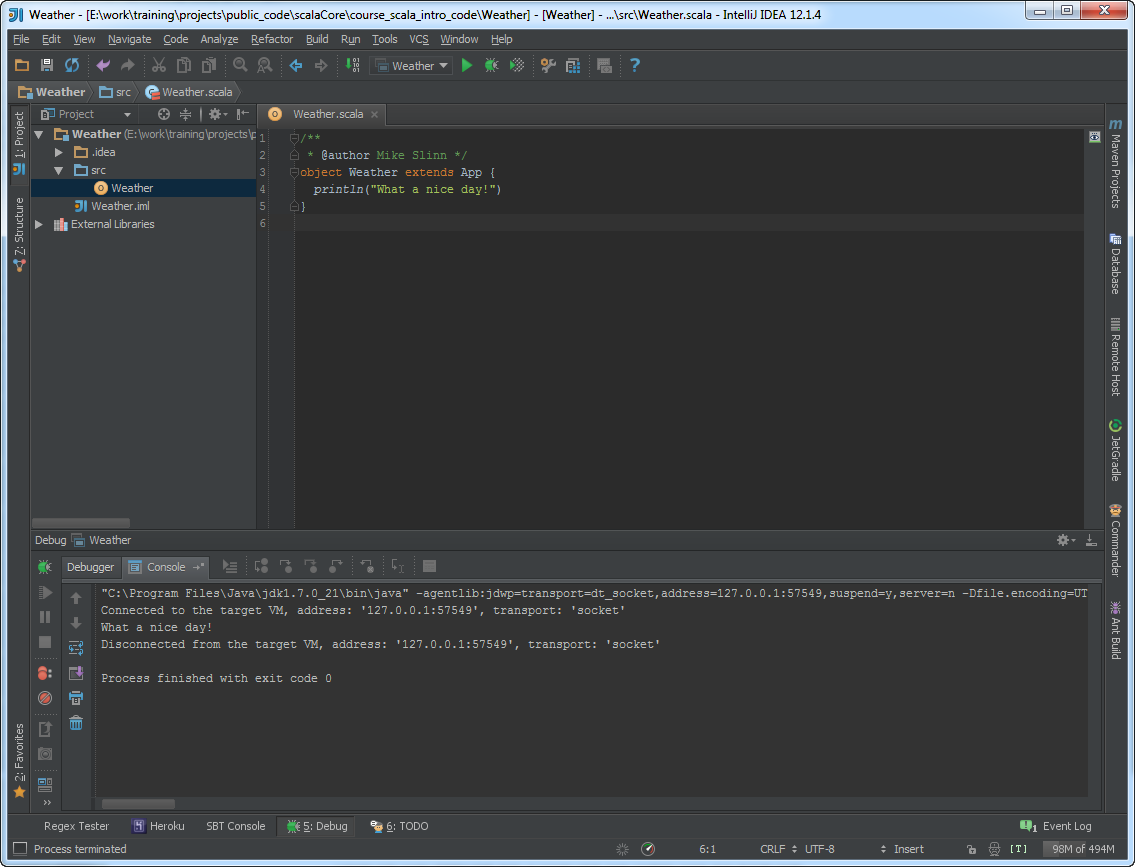
|
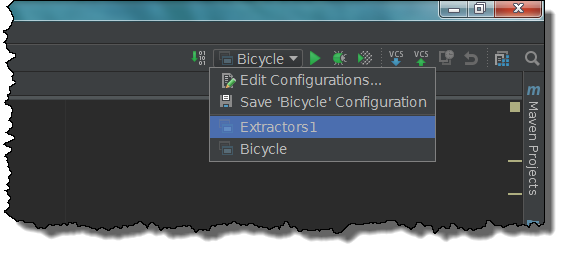
| 11) You can edit the debug configuration by clicking on the pull-down menu at the top center of the IDEA window. | 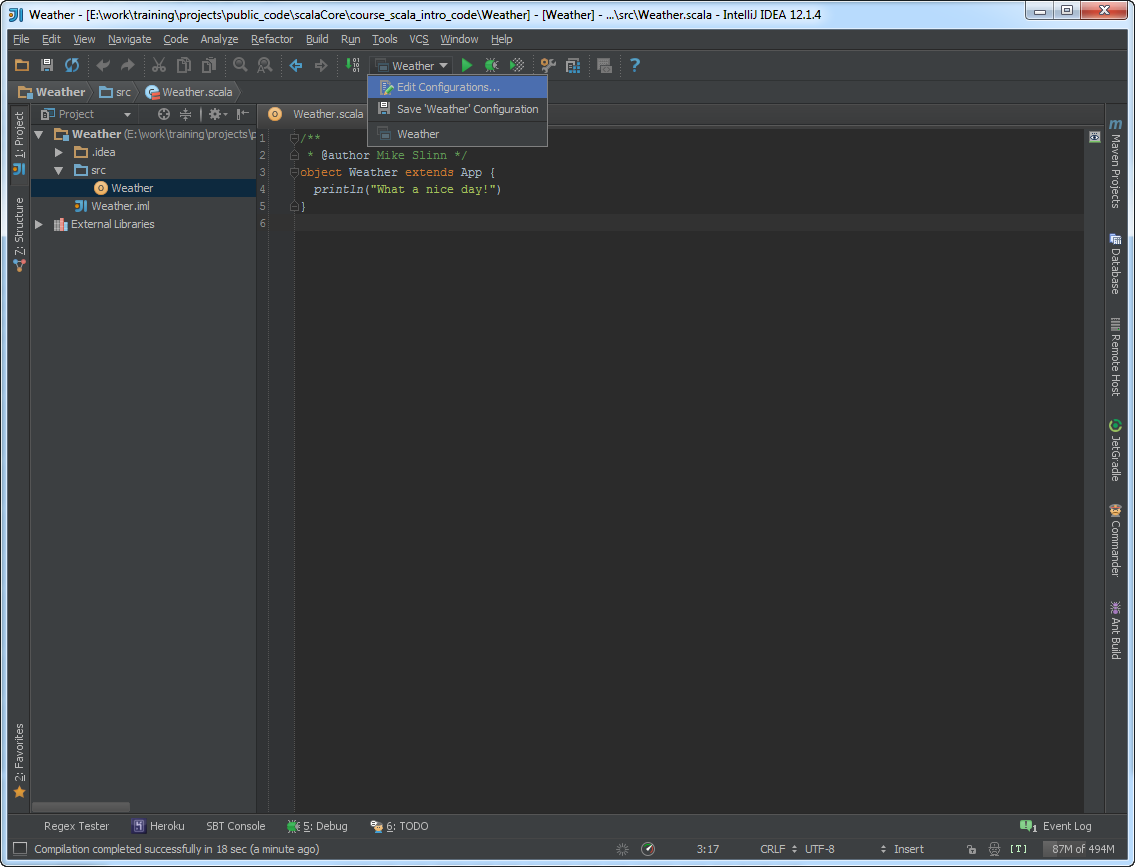
|
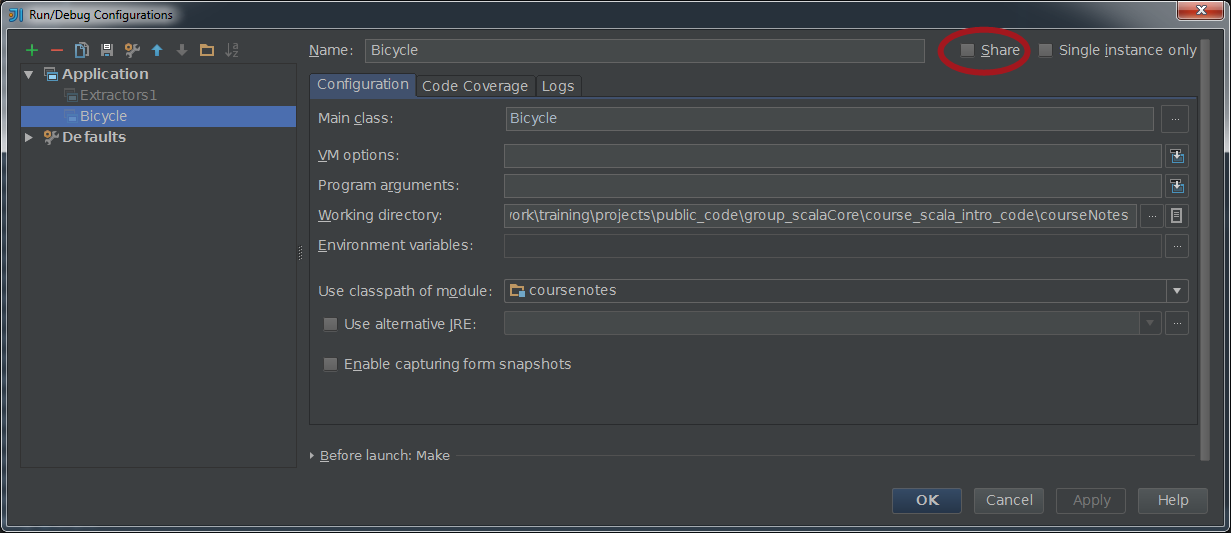
| 12) You can add arguments for the JVM and your program, as well as tweak other settings. | 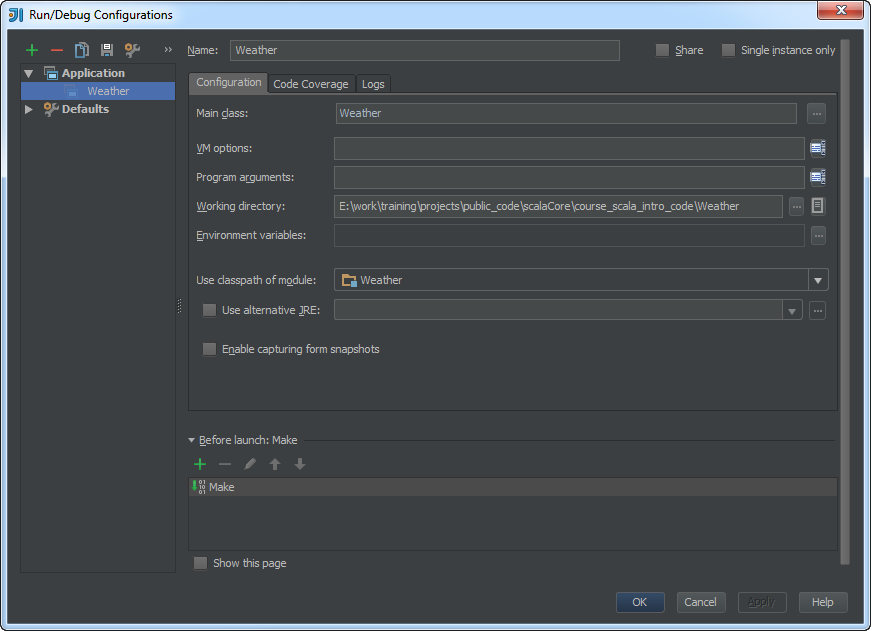
|
|
13) If you enable Share, the debug configuration is written to a file in the .idea directory.
You can check it into git if you want: | 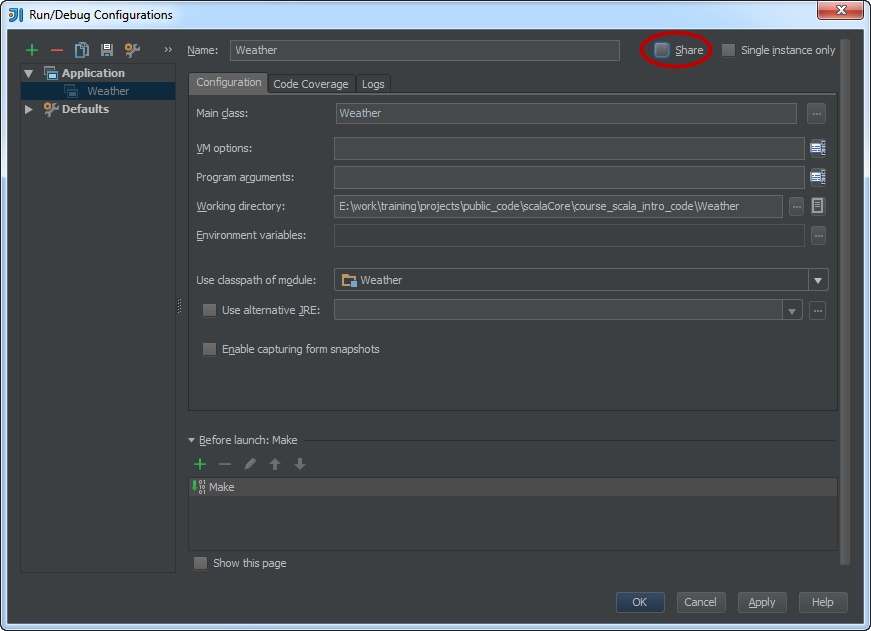
|
|
Shell $ git add -fA .idea/runConfigurations/* | |
| 14) A completed program. | 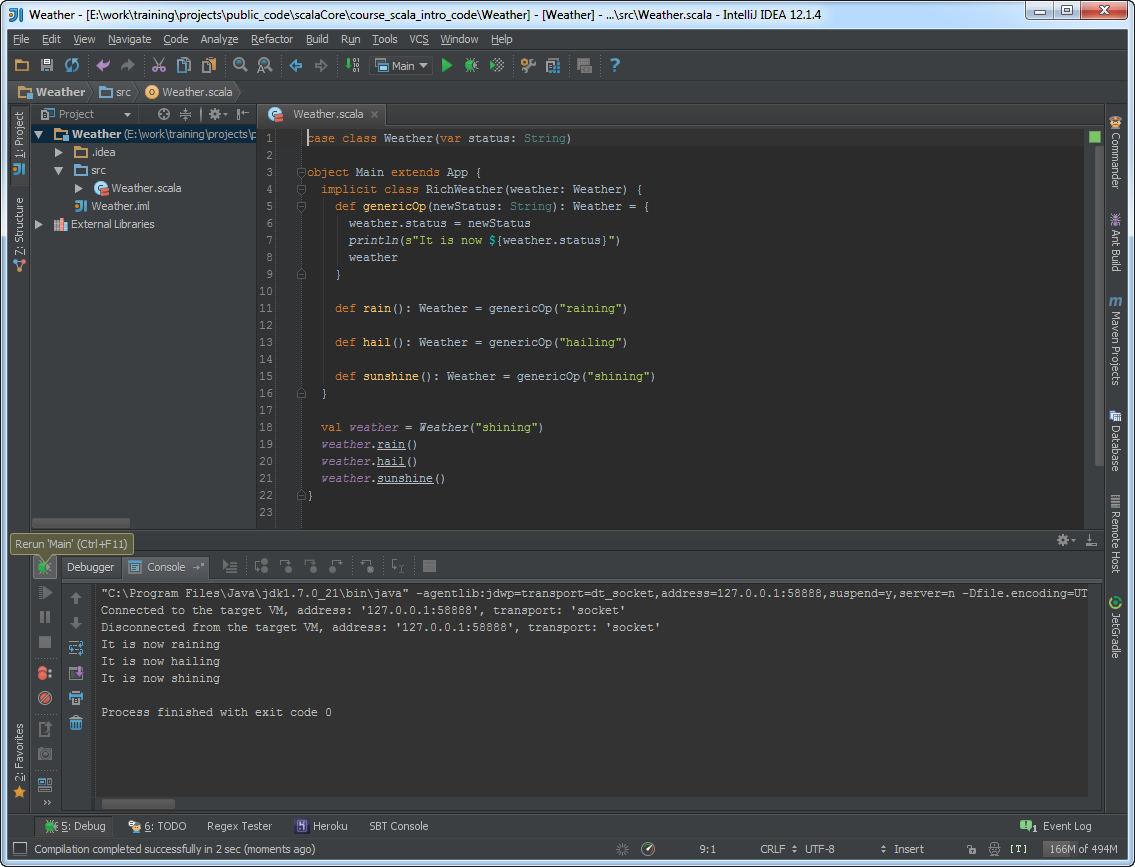
|
Working With the CourseNotes Project in IDEA
Please re-open the courseNotes project in IDEA. I showed you how to do that at the beginning of this lecture.
When you open a project for the first time there will be a small rotating icon at the bottom of the IDEA window, and the word Indexing... will appear next to it. The first time IDEA encounters a new jar, such as found with a new JDK, it will index the jar. This can take a while, and the process might slow down your computer noticeably. Some of IDEA’s functionality is not available when indexing.
- You could expand the
src/directory contents.
-
The
projectdirectory contains the sbt project files and directories. TheExternal librariesfolder is presented to you by IDEA so you can browse the project dependencies. The SBT Global Setup lecture mentioned that the files for these dependencies actually reside in~/.ivy2/. Recall that there are two instance of the Scala compiler, which probably have different versions, one for the SBT meta-project and one to compile your code. The dependencies for the SBT meta-project are found under thesbt-and-plugins/folder. -
If you did not follow the directions in the Setting Up IntelliJ IDEA lecture, the Project SDK might be invalid.
If so, you need to configure the project structure before you can compile.
The File / Project Structure menu item opens a new window.
You need to tell IDEA where the JDK is:
- Click the New... button.
- Select JDK and navigate to the directory that you installed the JDK.
- Click the Apply button at the lower right of the window.
- We are done with Project Settings.
-
Let’s run an entry point in the
courseNotesproject. Select a runnable application, such as theTimedDemoobject. I selected this object because it extendsApp, which means that it is the entry point for a console application.
-
Right-click and select Debug “TimedDemo”.
The project should compile and the
TimedDemoentry point will be executed. The Debug panel will open at the bottom of the IDEA window, revealing program output and debugging controls.
Helpful Hints
Disabling Scala / Play Parsing
You may find that the editor does not parse complex Scala code or Play templates properly.
If this happens you will see lots of good code highlighted as errors on the screen, and cutting and pasting may work improperly.
You can temporarily toggle the Scala for the editor parser off and on by clicking in the small [T] symbol at the bottom right of the screen, in the status bar area.
When Scala parsing is disabled, the symbol displays as [_].
Compensating for Over-Engineering of Hover Help
IDEA 12 had a terrific implementation of hover help. This excerpt from this lecture’s video from 2013 shows how it worked. Whenever you moused over a method or a class, and the Control or Command key was held down, hover help was displayed. This was done in a non-intrusive manner. At first clickable links were displayed, then if you clicked on them the Javadoc or Scaladoc was displayed.
IDEA 15 has embellished this feature so it is now in your face and quite annoying. Merely pausing the mouse over a method name or type causes the Documentation window to appear, obscuring your work. I have reached out to JetBrains asking for help controlling this feature, but I don’t think they understood the problem. Hopefully the situation will improve. Here is my workaround. Unfortunately, there are not enough global settings to control this feature, so you must set it up for each project.
- Deselect Settings / Editor / General / Show quick documentation on mouse move. Now the documentation window will only appear when you Ctrl-click or Cmd-click on a highlighted and underlined method name or type.
- Bring up the documentation window, open the mode control (the upper gear icon) and deselect Floating Mode. The documentation window is now tethered as a fly-out pane whose origin is the right edge of the IDEA window. BTW, there should not be two gear icons next to each other, since they perform different functions; this is needlessly confusing.
- Adjust the width of the documentation pane to your liking.
Scratch Files and Buffers
Ever need a place to store text? IDEA provides two ways of doing that. From the lable=online documentation:
- Scratch files
- The scratch files are fully functional, runnable, debuggable, etc. They require a language to be specified and have an extension. The scratch files are created via Ctrl+Shift+Alt+Insert.
- Scratch buffers
-
The scratch buffers are only intended for pure editing, and as such they do not require specifying a language and do not have an extension.
The scratch buffers belong to the
.txttype by default.
This action has no dedicated shortcut, but you can configure one as described in Configuring Keyboard Shortcuts.
Buffer files are reused after creating 5 files. So doing, after reuse, the content and language are reset.
Run / Debug Configurations
The run configurations are normally found in a pull-down menu at the top right of the screen. Run configurations can be used for debugging, simply running code, or for analyzing code coverage.
Run configurations can be shared.
When a run configuration is shared it is saved to an XML file and can be saved to your source code repository. This works best if everyone on the
team uses the same directory layout for the project. This run configuration is stored in .idea/runConfigurations/Bicycle.xml.
Running SBT Console Inside IDEA
It’s convenient to run the Scala console in an IDEA panel. When used from IDEA, you get the actual SBT console which means:
- Your program must compile or SBT console won’t launch.
- SBT console uses the SBT project
classpath. -
As we discussed in the SBT Project Setup and
SBT Tasks and Settings lectures, you can set
initialCommands in consoleinbuild.sbtto a series of statements that you wish to execute each time the SBT console launches.
To launch SBT console from IDEA:
- Wait until any background tasks have completed.
- Press Ctrl-Shift-D, or right-click in the editor and select the Run Scala console menu item.
- The Scala console panel should open on the bottom of the IDEA window, and eventually you should be presented with the
scala>prompt. - Type in
1+1Ctrl-Enter. If you forget, and just type Enter instead of Ctrl-Enter, you’ll get frustrated because nothing useful will happen. - You can enter any Scala expressions you wish, followed by Ctrl-Enter.
- You can select Scala code in an open editor pane, and cause it to be sent to the Scala console by pressing Ctrl-Shift-X (for Windows) or Cmd-Shift-X (for Mac). You can also right-click on the selected code, and select Send Selection To Scala Console to get the same result.
Demo
- Ctrl-e show list of files
- Shift-Shift search everywhere; here you can see I am searching for the text
"Monday", and all the occurrences of that text in my source code are shown. Enable Include non-project items to search dependencies as well. Click on a search result to view the file containing the reference. - Notice how the navigation bar, also called breadcrumbs, shows the path through to the directory structure of the project to the file from your project displayed in the currently selected editor pane. It does not automatically update if you view a dependency unless you click on the Scroll from source button.
- When editing a file, click the Scroll from source button. The file will be selected in the Project pane. If you do this while editing a dependency you will see the dependency highlighted in the Project pane.
- Open the Structure pane to view the object-oriented structure of the contents of the currently selected editor pane. The controls for the Structure pane are shown at the top of the pane. The controls differ for Scala and Java source code. For Java source you can group methods that this class overrides from each supertype by enabling the Group Methods by Defining Type button, and properties can be displayed by enabling the Show Properties button. For both Scala and Java source, the methods can be sorted alphabetically instead of being displayed in the order that they occur. You can also sort by visibility, so public methods are at the top and increasingly private members are shown below.
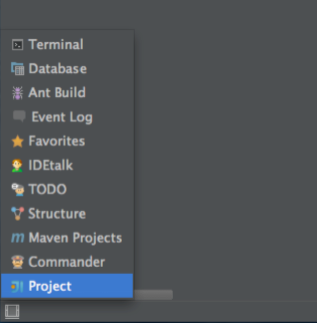
- Alt-1 toggles the visibility of the Project pane (you should get in the habit of hiding the Project pane when you have two vertical editor panes open). You can also toggle the Project pane visibility by clicking on the Project tab. You can hide the Project pane by clicking on the little arrow button at the top right of the Project pane.
- You can split the editor window into horizontal and vertical panes by right-clicking on an editor tab. This helps when referencing a file while
editing another. Here you can see me right-click on the
LocalDateTime.java class, select the Split Vertically menu item, right-click on theQuine.scalatab and select the Move to Opposite Group menu item so it opens to the new editor pane. The Open in Opposite Group menu item causes the tab to appear in both panes. You can divide up the editor window into as many tabs as you like. - Click the navigation bar / breadcrumbs to navigate source; this means you don’t need to have the Project pane open all the time.
- You can join lines together with Ctrl-Shift-j. This is similar to the
vicommand. - Use Ctrl-click / F3 to go to the definition of a type or method. I used Ctrl-hover as I moved the mouse over a
reference to the
lengthproperty of theargsvariable; this shows that the variable has typeArrayand the property has typeInt. When I Ctrl-click on theArray.lengthproperty the decompiled source code forArray.scalais shown in the editor.Arrayis part of the Scala runtime library. It was decompiled because IDEA did not know where the source code for the Scala runtime was. - When decompiling a dependency is not good enough, you can download or attach source. Here you can see me download the source code for
Array.scala. The downloaded file isscala-library-2.11.7-sources.jar, andArray.scalais found within thescalapackage. - Here you see I’ve opened the Project pane, and with
Array.scaladisplayed in the active editor pane I can click on the Scroll from source button.Array.scalanow scrolls into view in the Project pane, and you can also see the other classes in the Scala runtime library. - The SBT panel also shows dependencies, and allows you to modify them. You cannot view inside the jars when using the SBT panel, however.
- Ctrl-Shift-t search for type (not just classes). Notice the Include non-project classes checkbox; enable it to search dependencies. There is also a filter pull-down, and you can use it to restrict the types of resources to search. All resources are searched by default.
- Alt-2 toggles the favorites pane, which includes favorite files in projects, bookmarks and breakpoints. To mark a file as
a favorite, right-click on an editor tab and select the Add to favorites menu item, then the favorites group you wish to associate the
favorite with. Here you can see that I’ve already made a favorites group called
courseNotes. Open the favorite group in the Favorites tab to see the new favorite file. - Right-click an open tab and enable Sort tabs by filename.
- Ctrl-shift double-click on a file in project view opens it in an editor in a new window. Alternatively, to detach an editor tab, drag it outside of the main window. A preview thumbnail appears and the editor tab is opened in a separate window. You can drag editor tabs between windows. If a window has no editor tabs it automatically closes.
- Alt-7 toggles the structure pane
- Ctrl-Alt-Shift-V (Paste Simple) when inserting multiple lines into triple-quoted string
- The TODO pane groups todo and fixme - can group by package or by file (within selected scope), can expand all, collapse all, autoscroll to source, filter and show preview, show next/previous
- View dependencies in External Libraries node of Project pane (where you can browse classes) or in SBT pane (where you can modify dependencies)
- Recommended plugins:
- RegexPlugin (v0.7.2+) – 3rd party plugin, installed by the Settings / Plugins Browser Repositories button.
- Open in terminal (v0.1+) – JetBrains plugin, only available when IDEA runs on Mac or Linux. Sorry, Windows users!
Useful IntelliJ Hot Keys
If you have set up Eclipse keyboard shortcuts as described in the Working With IntelliJ IDEA lecture, the following extra keyboard shortcuts are specific to IntelliJ IDEA.
Alt + = Shows the inferred type of the highlighted variable or expression.
Shift Shift (twice in a row) - search everywhere, also shows recently edited files
Ctrl + E Open recently edited files
Ctrl + Shift + E Open recently changed files
Ctrl + Shift + T Search for a type
Ctrl + hover Shows summary of all kinds of useful information about artifact under cursor.
Alt + 1 (one) Toggle project view
Alt + Home Open navigation bar, use arrow keys and Enter to navigate
Ctrl + Space Code completion.
Alt + Enter Correct syntax of code / accept code improvement suggestion
Ctrl + B Rebuild project.
Ctrl + Shift + A Search for Action by typing a few consecutive letters (learn key bindings, or perform unbound actions)
Ctrl + Shift + B Toggle breakpoint on current line.
Ctrl + Shift + J Join lines.
Ctrl + Shift + V Paste from 5 most recent copies.
Shift + Alt + Insert Toggle column select mode
Ctrl-Alt-Shift-V (Paste Simple) when inserting multiple lines into triple-quoted string
Ctrl-Shift-t search for type
Hot Keys From Eclipse Key Bindings
The following are some of the keys defined when you enable Eclipse key bindings.
Ctrl + d Delete current line.
Alt + ↑ Move the current line up, or move the selected lines up
Alt + ↓ Move the current line down, or move the selected lines down
Ctrl + f Highlight all occurrences of selected text, and optionally search in current file.
Ctrl + h Find in source directories, or if a directory is highlighted in the project pane, restrict search to that subdirectory tree.
Ctrl + g Display list of overrides or implementations.
Ctrl + / Comment / uncomment current line (toggle).
Ctrl + Shift + / Comment / uncomment current selection (toggle).
F2 or Ctrl + Shift + Space Show documentation for the type or method signature of the selected expression.
Ctrl + F Reformat file or selected code.
Alt + Shift + R Rename artifact under cursor.
Ctrl + Shift + R List matching files anywhere in project and optionally open one. Can also specify a filter.
Exploring Project Dependencies
We learned about SBT’s support for exploring the explicit and transitive dependencies of a project in the
SBT Tasks and Settings lecture.
IntelliJ IDEA has a more advanced capability than SBT or any current SBT plugin,
but the feature is difficult to use and does not provide information about transitive dependencies, even though it should.
I filed an issue with JetBrains,
so this issue may be addressed at some point.
To use it, follow these steps; I used this feature to analyze the courseNotes SBT project:
-
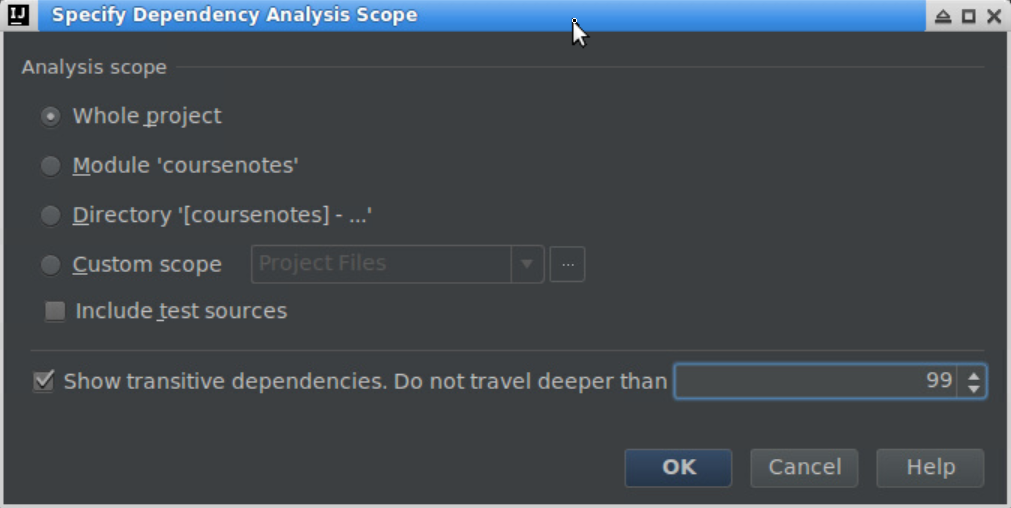
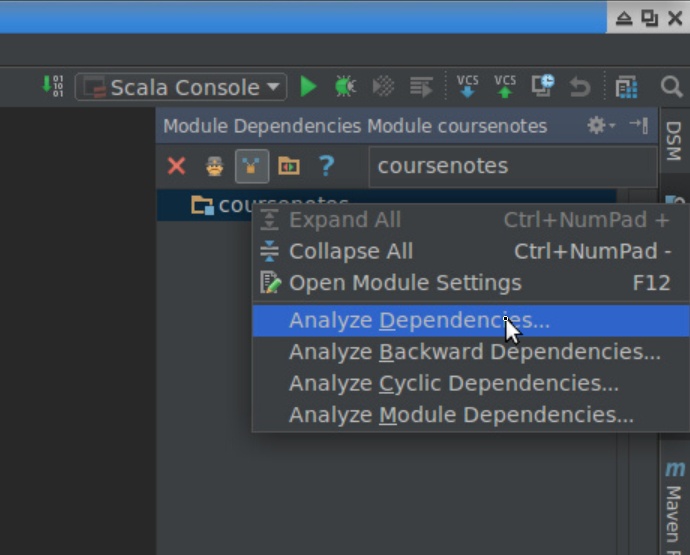
Right-click on the root of your project in the IDEA Project panel and select the Analyze / Analyze Module Dependencies menu item.
Enable Show transitive dependencies.
Caution: if you increase the value for Do not travel deeper than then this process may never complete.
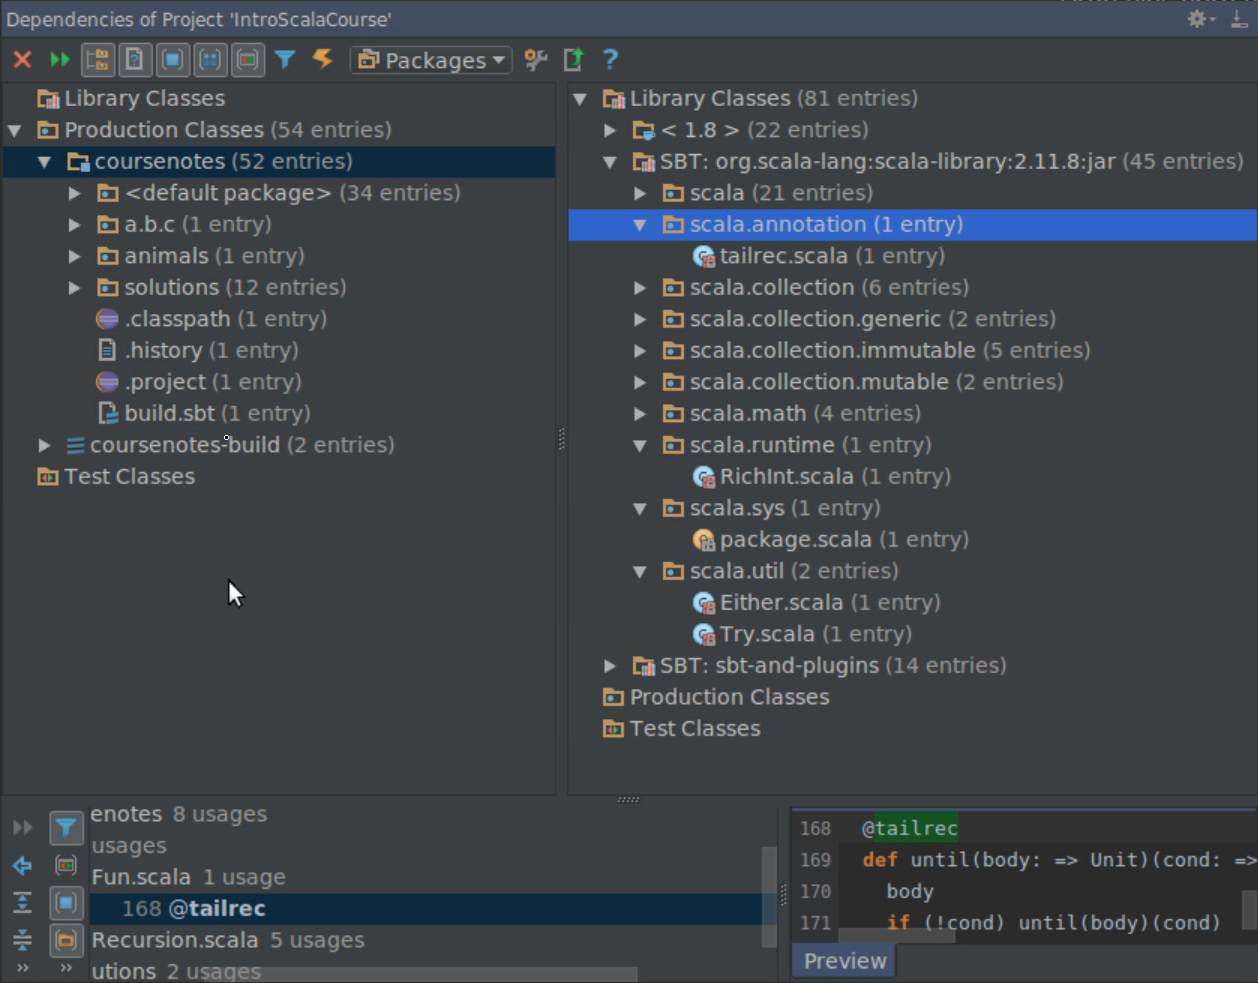
- The Module Dependencies panel will open; by default it appears on the right.
- Right-click on the project name and select the Analyze Dependencies menu item.
- A new panel labeled Dependencies of Project ’project name’ will open at the bottom of the IDEA window. You can learn a lot by
exploring it.
Try out this feature on a larger project and see how it works!
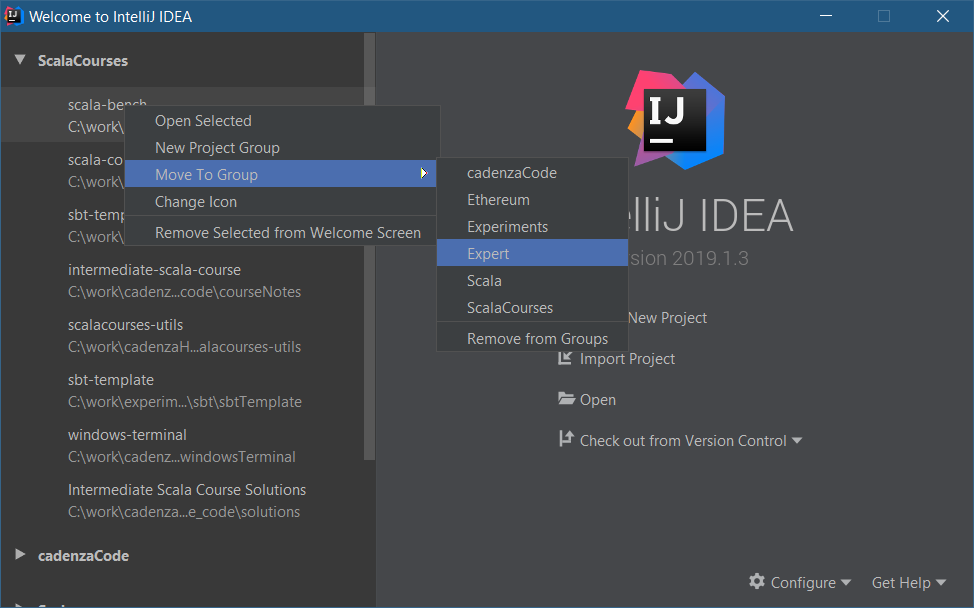
Project Groups
IDEA 2019.1 introduced project groups, which manifest as folders for grouping projects together on the opening dialog screen. Here are my project groups:
Now I open the ScalaCourses group:
Right-clicking on a project shows a menu that allows you to move the project to another group, and more:
© Copyright 1994-2024 Michael Slinn. All rights reserved.
If you would like to request to use this copyright-protected work in any manner,
please send an email.
This website was made using Jekyll and Mike Slinn’s Jekyll Plugins.